Step-by-step guide
Here are some pre-made Zaps that you can use straight away.
To build your own Zap follow these instructions…
Preparation
These steps will create the appropriate settings you need inside Zapier.
If you prefer, you can request a verification directly in IdentityCheck here.
- Create an IdentityCheck account.
- Create an API key for IdentityCheck here. Select all scopes.
- Create a new Zap within Zapier.
- Select your trigger (e.g. Google Sheets, your CRM, or wherever contains the email address of the contact you want to verify.
- Map fields to columns. Email address is the only mandatory field.
- Select that you want to request a new IdentityCheck as per your required logic.
Once these are complete, proceed to request your first verification.
Step 1: Open your trigger app (CRM, Sheet, etc.)
You will have chosen this trigger app during the Zap creation process.
Step 2: Trigger the IdentityCheck for your chosen Contact
Perform the action you configured to act as the trigger event. E.g. For Sheets you may have selected ‘added a new row’, or for a CRM or Practice Management software you might have selected on creation of a new Contact.
This will result in a request to IdentityCheck to send the Contact an ID check email.
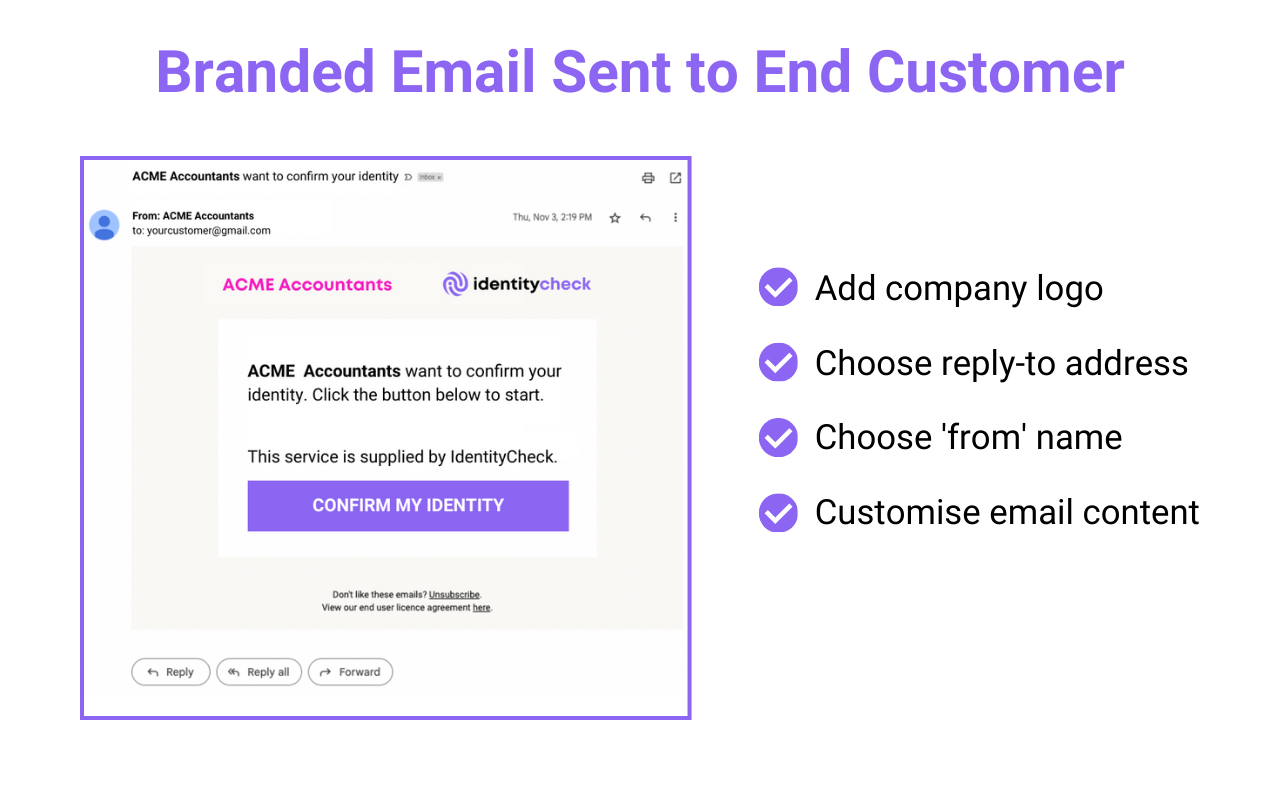
Step 3: Branded email is sent to the Contact
You can add your company logo and preferred wording in the KYC email customization settings.

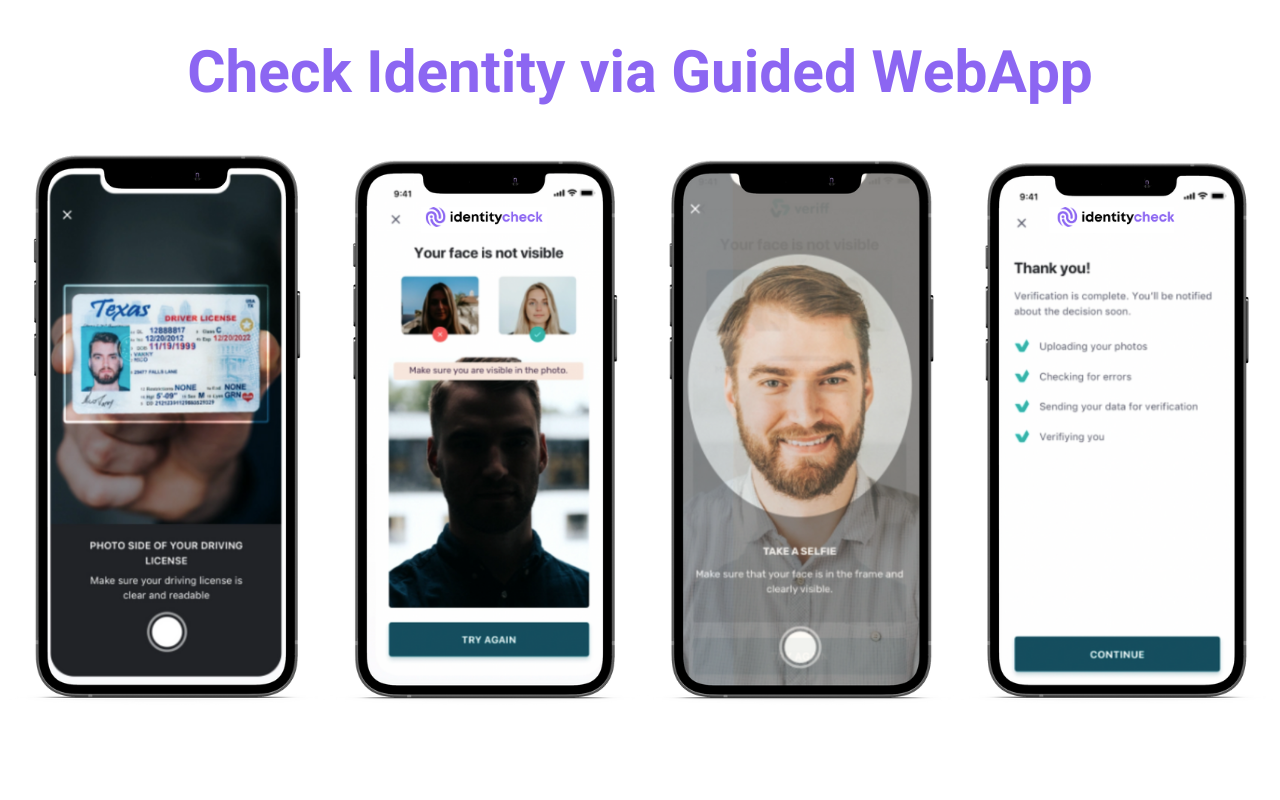
Step 4: Contact completes Identity Check
The Contact opens a guided web browser session to take a picture of their Government-issued ID and a selfie.

Step 5: Track results via the dashboard
You can also create automated Reminders for clients here, and internal Notifications here.
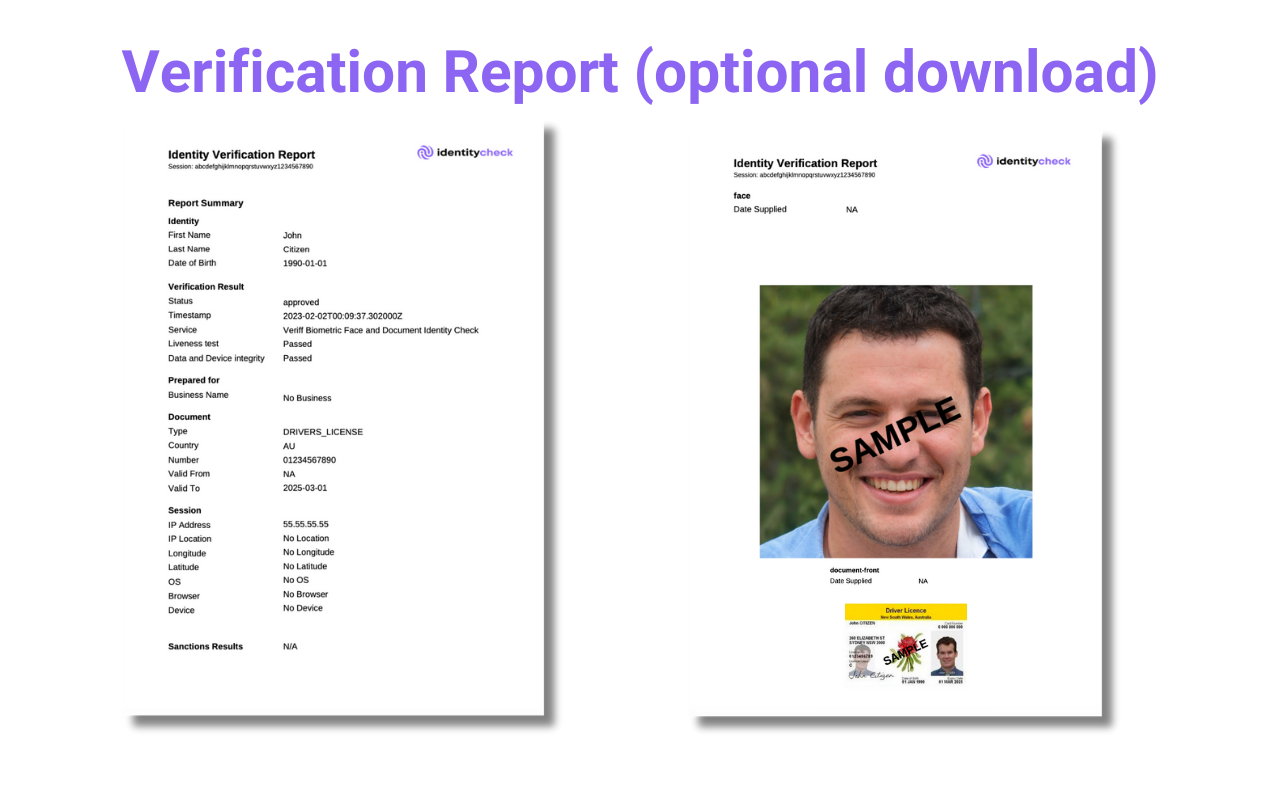
Step 6: Review detailed results
If you are an IdentityCheck user, you can log in to see the KYC result.

If you have AML screening such as Adverse Media, PEP, and Sanctions, you can review the result on the same page.
Overview of Zapier
Zapier is a web-based automation tool that connects your favorite apps, allowing them to share data and trigger actions between each other without the need for manual intervention. It acts as a bridge between over 3,000 web services, enabling users to create automated workflows, known as Zaps. These Zaps can automate parts of your business or personal tasks, streamlining processes that would otherwise require manual effort and time.
Who Zapier Integrates With
Zapier integrates with a vast array of services across various categories, including marketing, CRM, productivity, social media, eCommerce, and more. Some of the popular services Zapier integrates with include:
- CRM and Sales: Salesforce, HubSpot, Zoho CRM
- Email Marketing: Mailchimp, Constant Contact, ActiveCampaign
- Social Media: Facebook, Twitter, Instagram, LinkedIn
- Productivity: Google Workspace (formerly G Suite), Microsoft Office 365, Slack, Trello
- E-commerce: Shopify, WooCommerce, Etsy
This wide range of integrations makes Zapier a versatile tool that can fit into almost any workflow or business process.
How Zapier Can Work with IdentityCheck
IdentityCheck, a platform designed to streamline the identity verification process, can potentially integrate with Zapier to automate identity verification requests and streamline workflows further. Here’s how it works:
- Trigger Setup: You set up a Zap where the trigger is an event in one of the apps you use. For example, a new client form submission on your website, a new contact added to your CRM, or a new order placed on your eCommerce platform.
- Action Configuration: The action for this trigger would be sending an identity verification request through IdentityCheck. Once the trigger event occurs, Zapier automatically sends the necessary information (like the client’s email address) to IdentityCheck.
- Identity Verification: IdentityCheck processes the request by sending an email to the client, asking them to verify their identity using a government-issued ID and a selfie. This process is secure and designed to comply with regulatory requirements.
- Completion and Follow-up: Once the identity verification is complete, IdentityCheck can send the verification status back to your app or another app in your workflow. For instance, updating the client’s status in your CRM or sending a notification to your team via email or Slack.
- Automation and Efficiency: This integration can significantly reduce manual work, speed up the onboarding process, ensure compliance, and enhance customer experience. It also allows for the automation of follow-up tasks based on the outcome of the identity verification, such as sending welcome emails, creating tasks for account managers, or triggering additional verification steps if needed.
Conclusion
By integrating IdentityCheck with Zapier, businesses can automate the identity verification process as part of their broader automated workflows. This not only saves time and reduces the potential for human error but also ensures a smoother, more secure onboarding process for clients. While specific integration capabilities would depend on the API and features offered by IdentityCheck, the potential for enhancing efficiency and security through automation is significant.


