Meeting KYC compliance requirements without an arduous manual process can be tricky to implement. However, leveraging your existing tech stack alongside integrated B2B software can make life much easier, and save you thousands of human hours in the long run.
Btw, if you haven’t already, we recommend reading our 10-step guide to automating KYC inside HubSpot, and our general guide to automated identity checking.
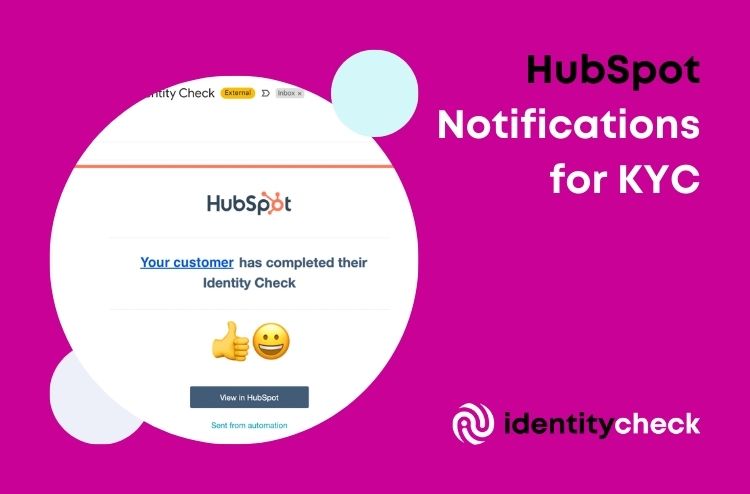
If you’re a HubSpot user, a useful step is automating notifications relating to completed identity checks. This step-by-step guide explains how to set up notifications. You will need an IdentityCheck subscription to start (don’t worry – an Account is free to setup).
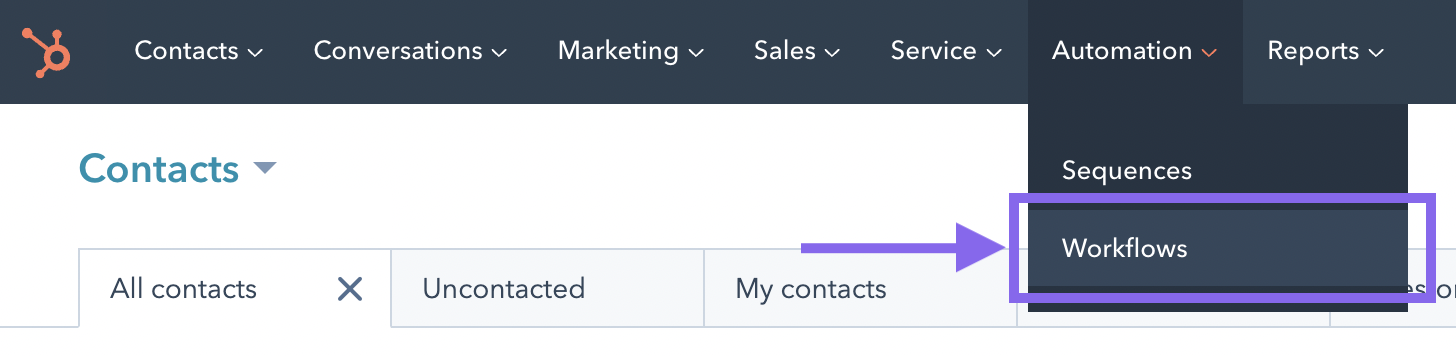
Step 1: Select “Workflows” from “Automation” menu
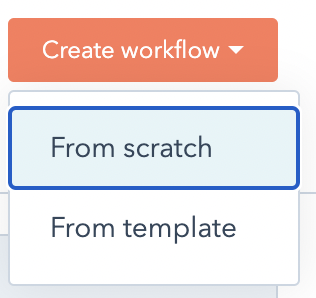
Step 2: Select “Create workflow > From scratch”
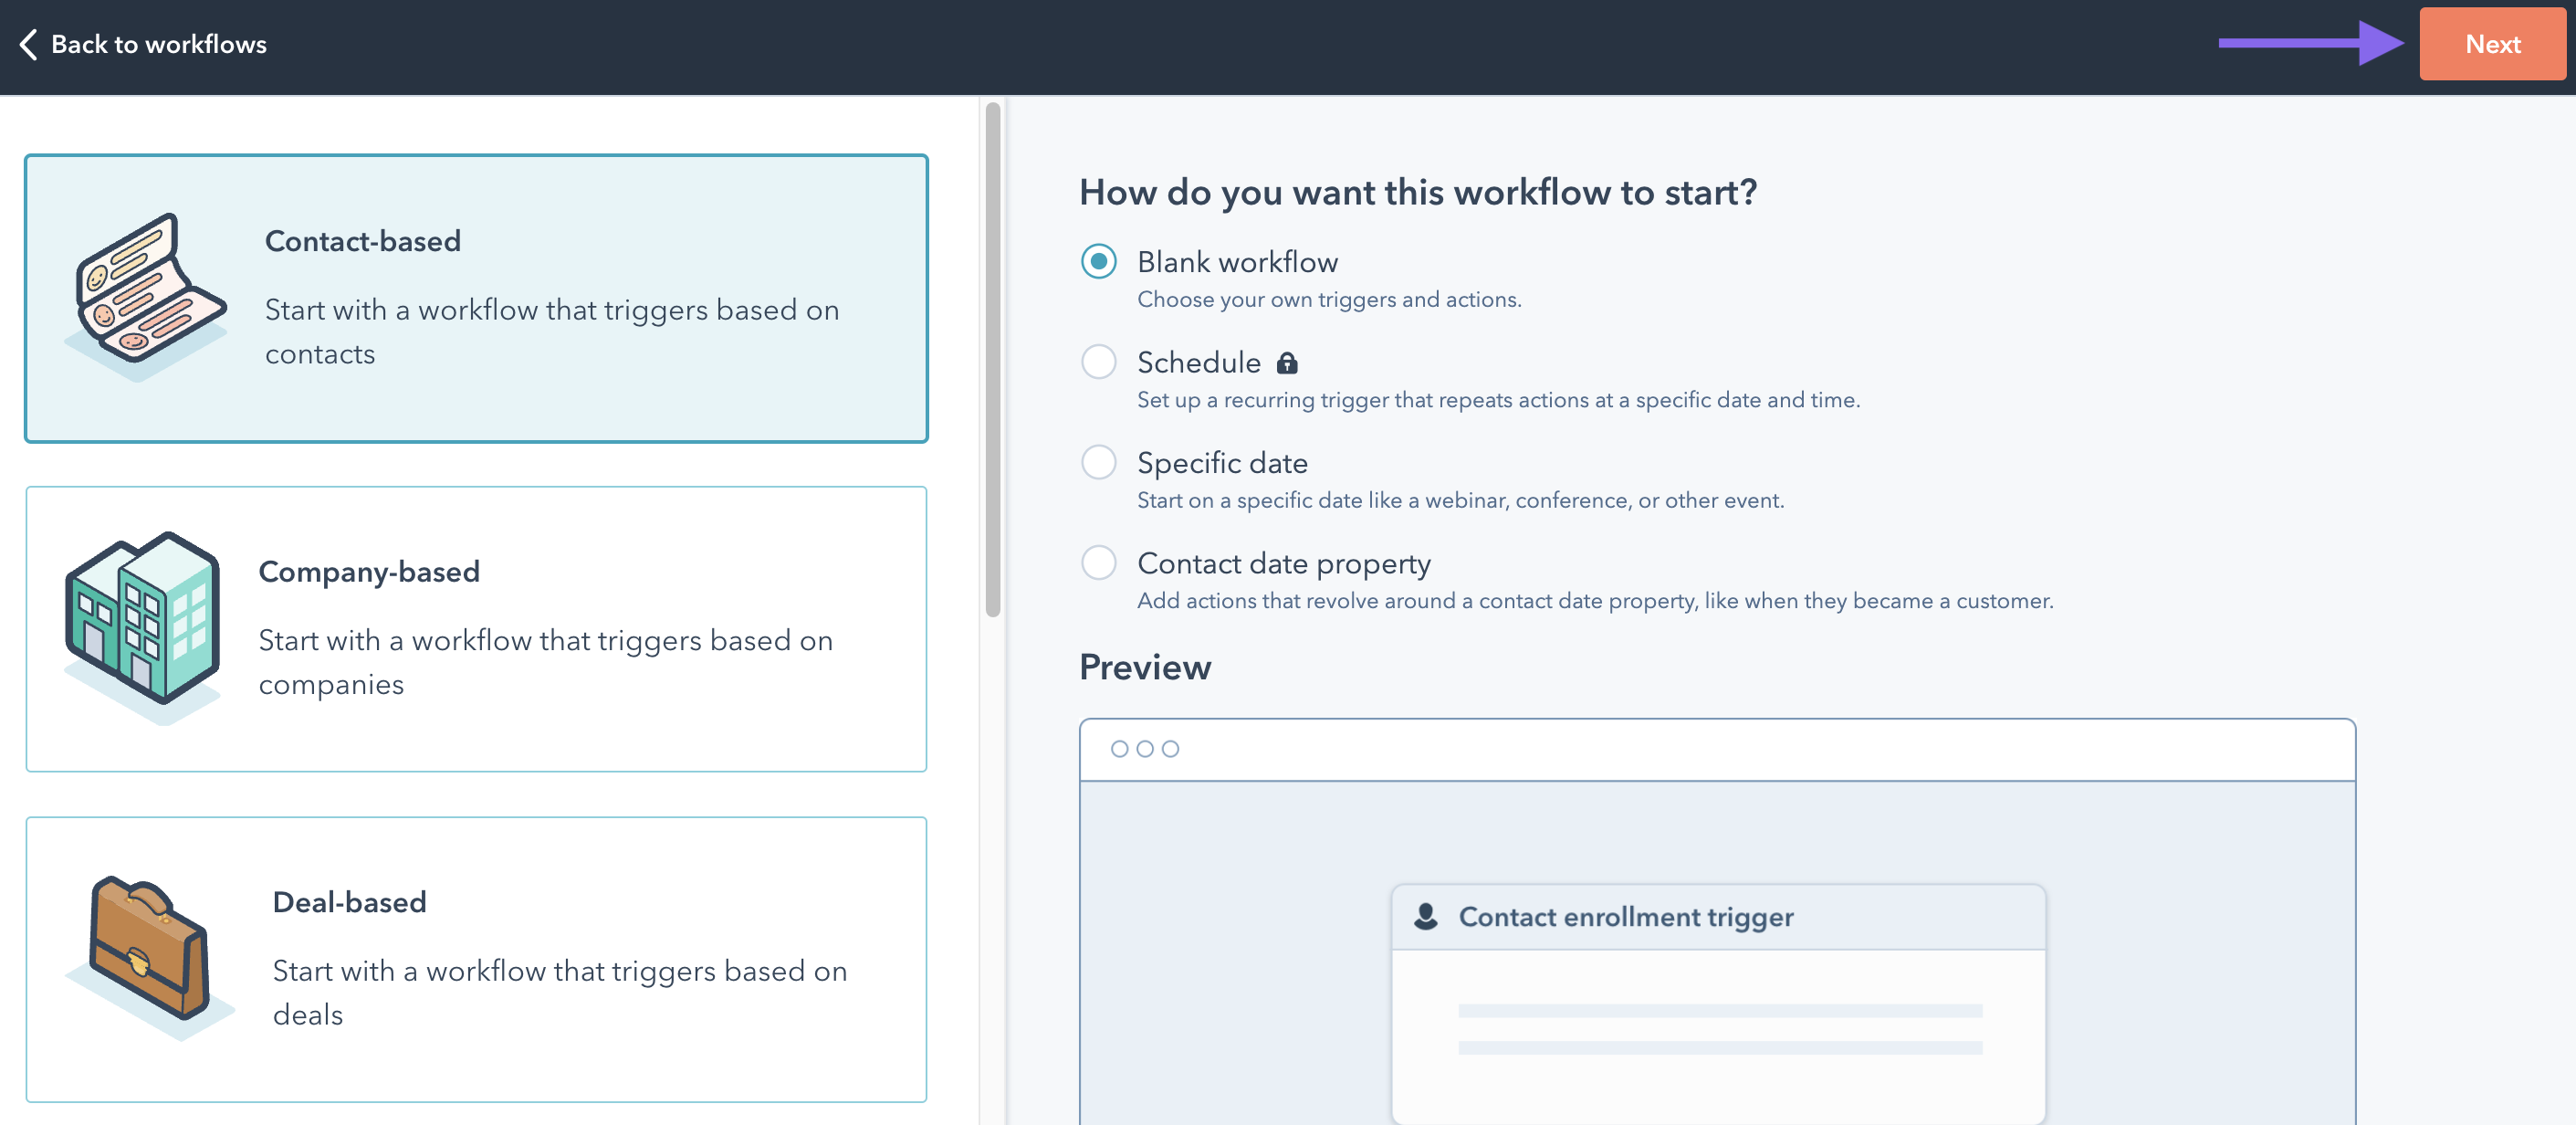
Step 3: Select “Contact-based” and “Blank workflow”, click “Next”
Step 4: Name your Identity Check workflow
Choose any name you like! 🙂

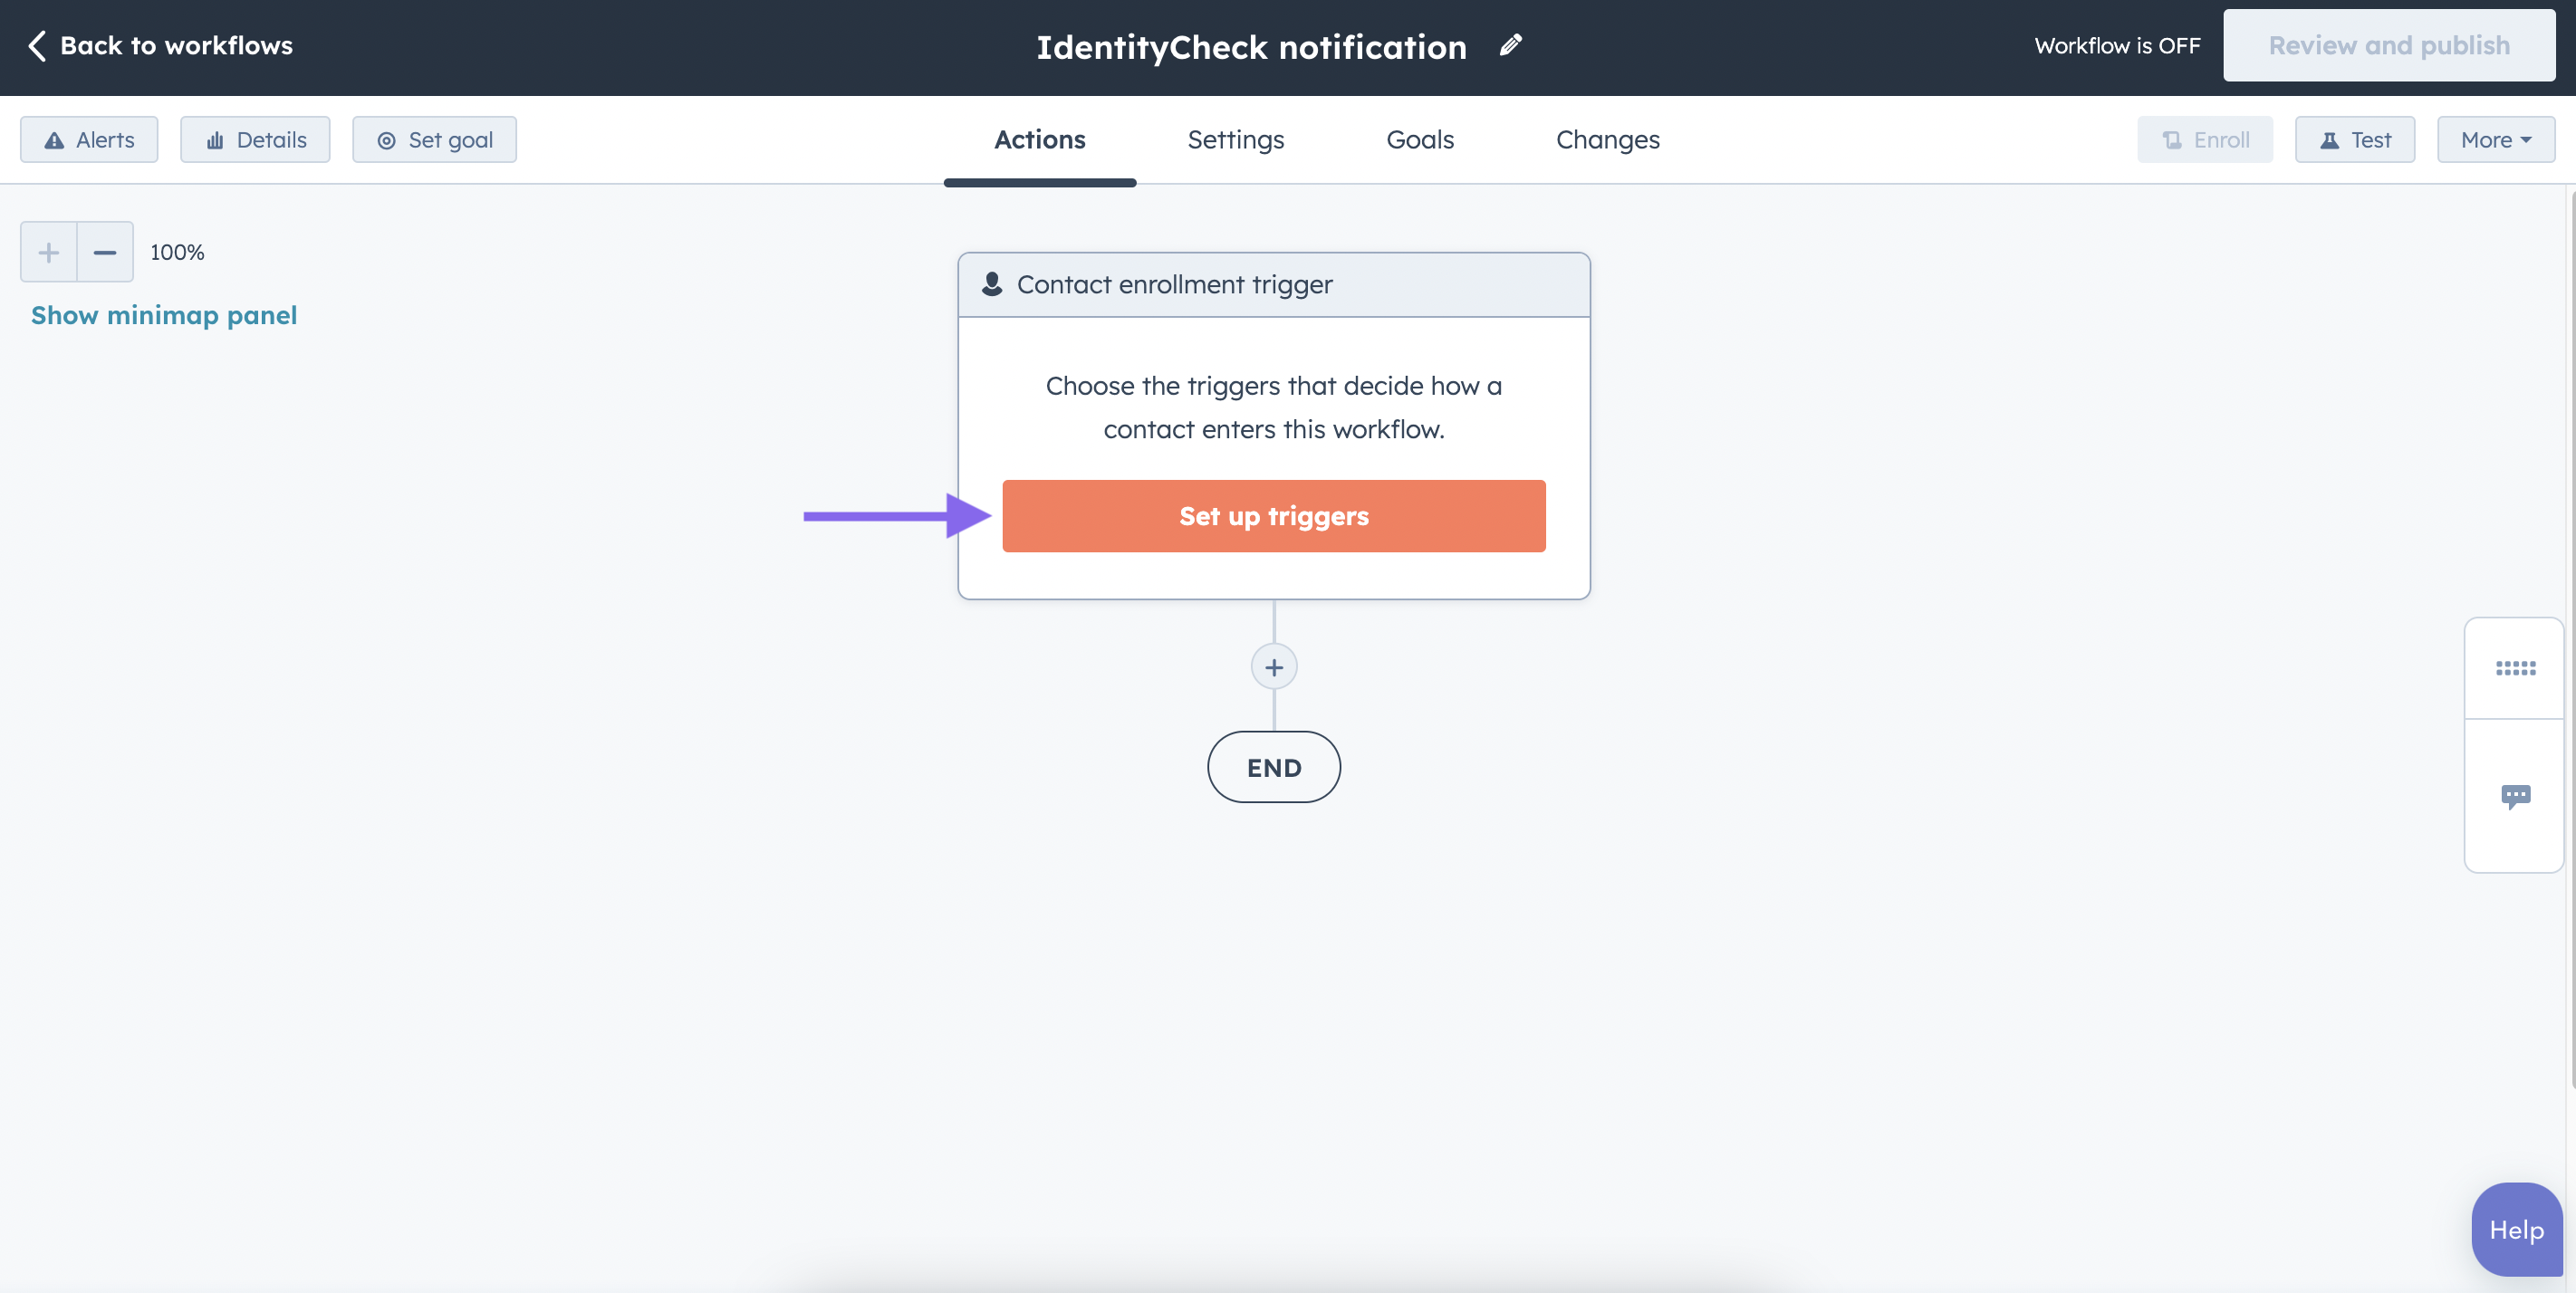
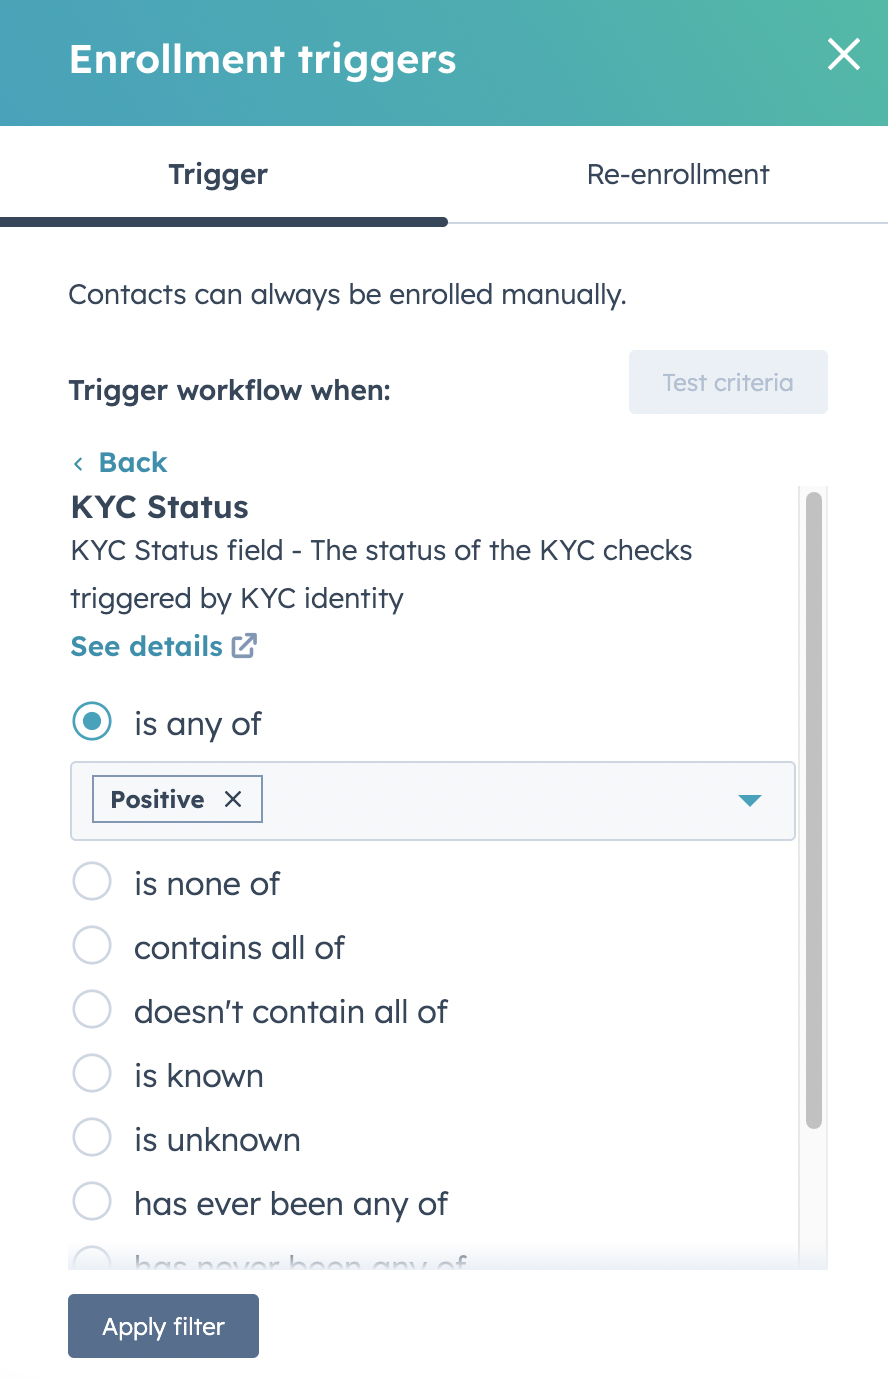
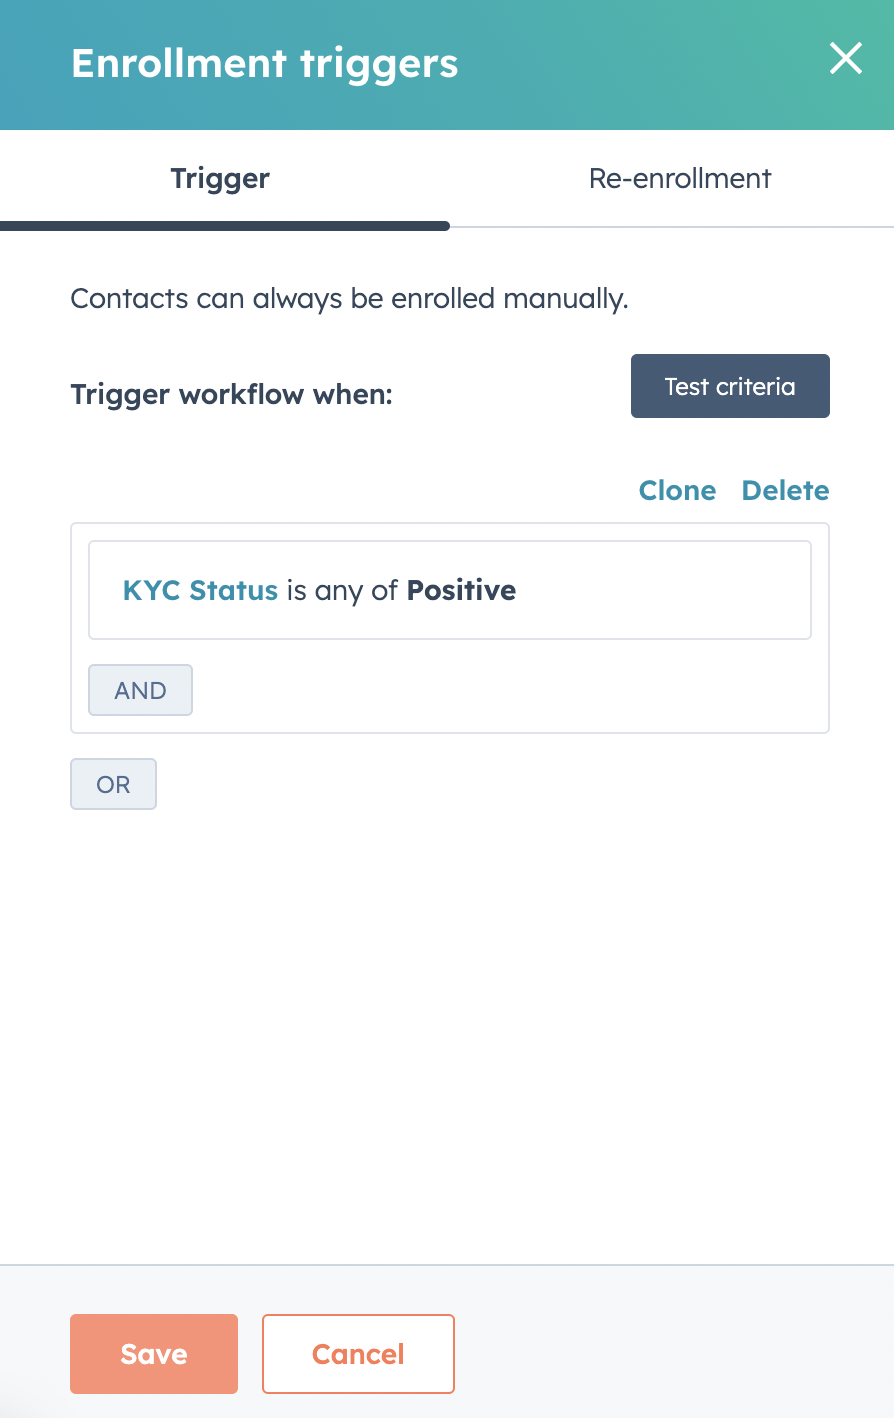
Step 5: Set up triggers
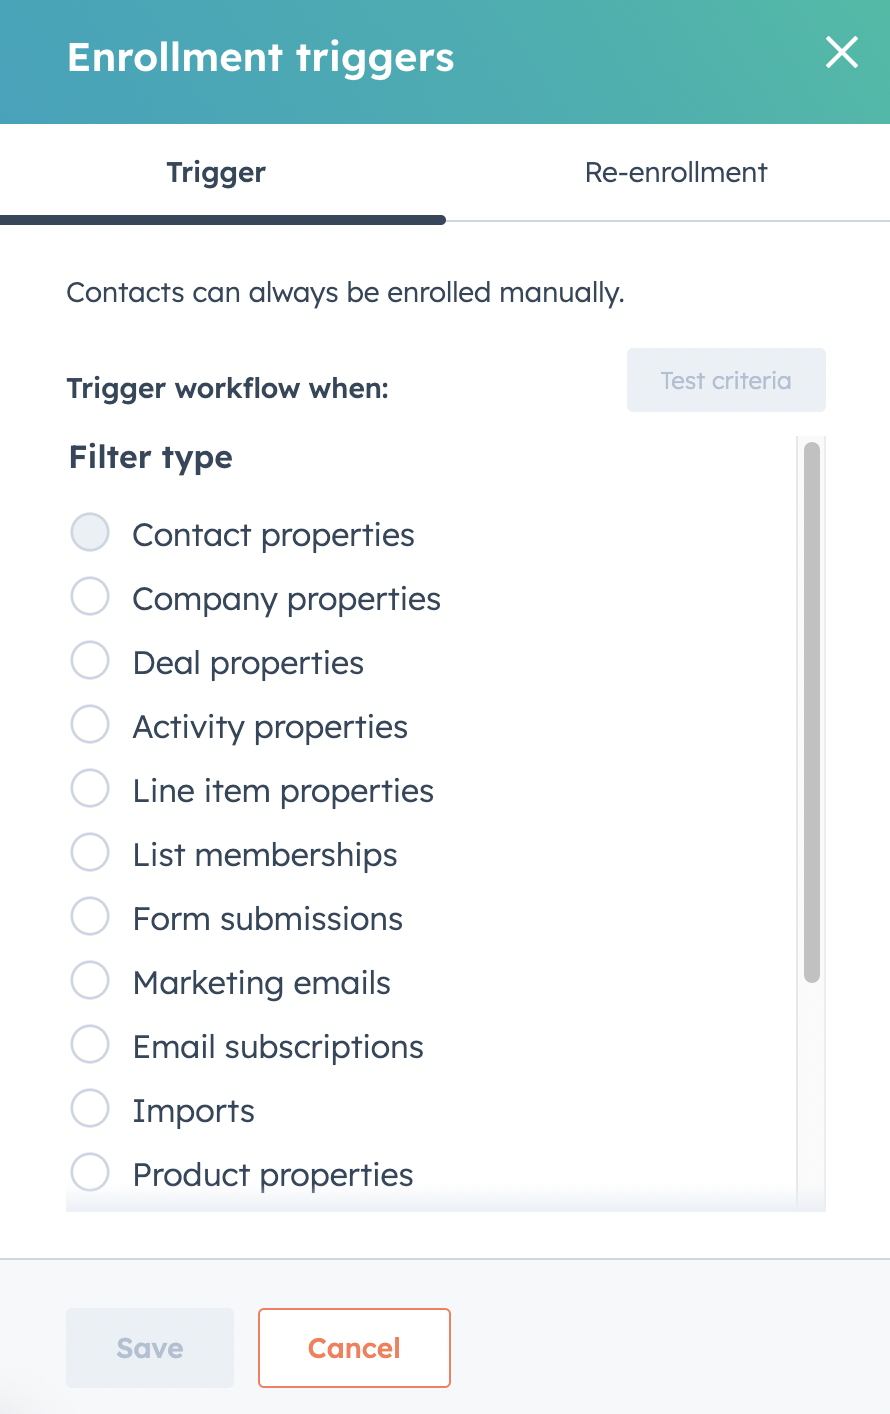
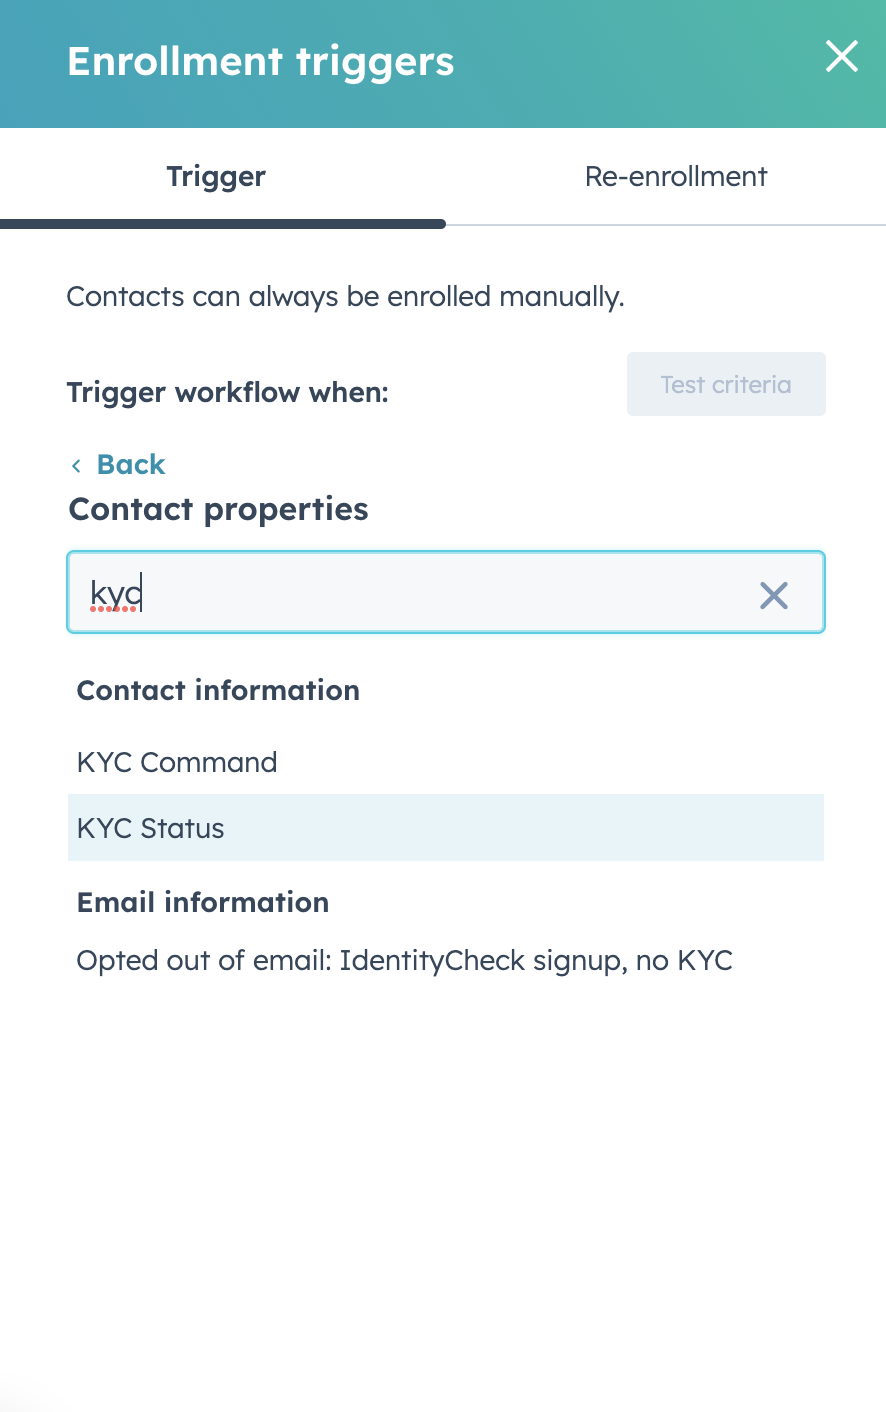
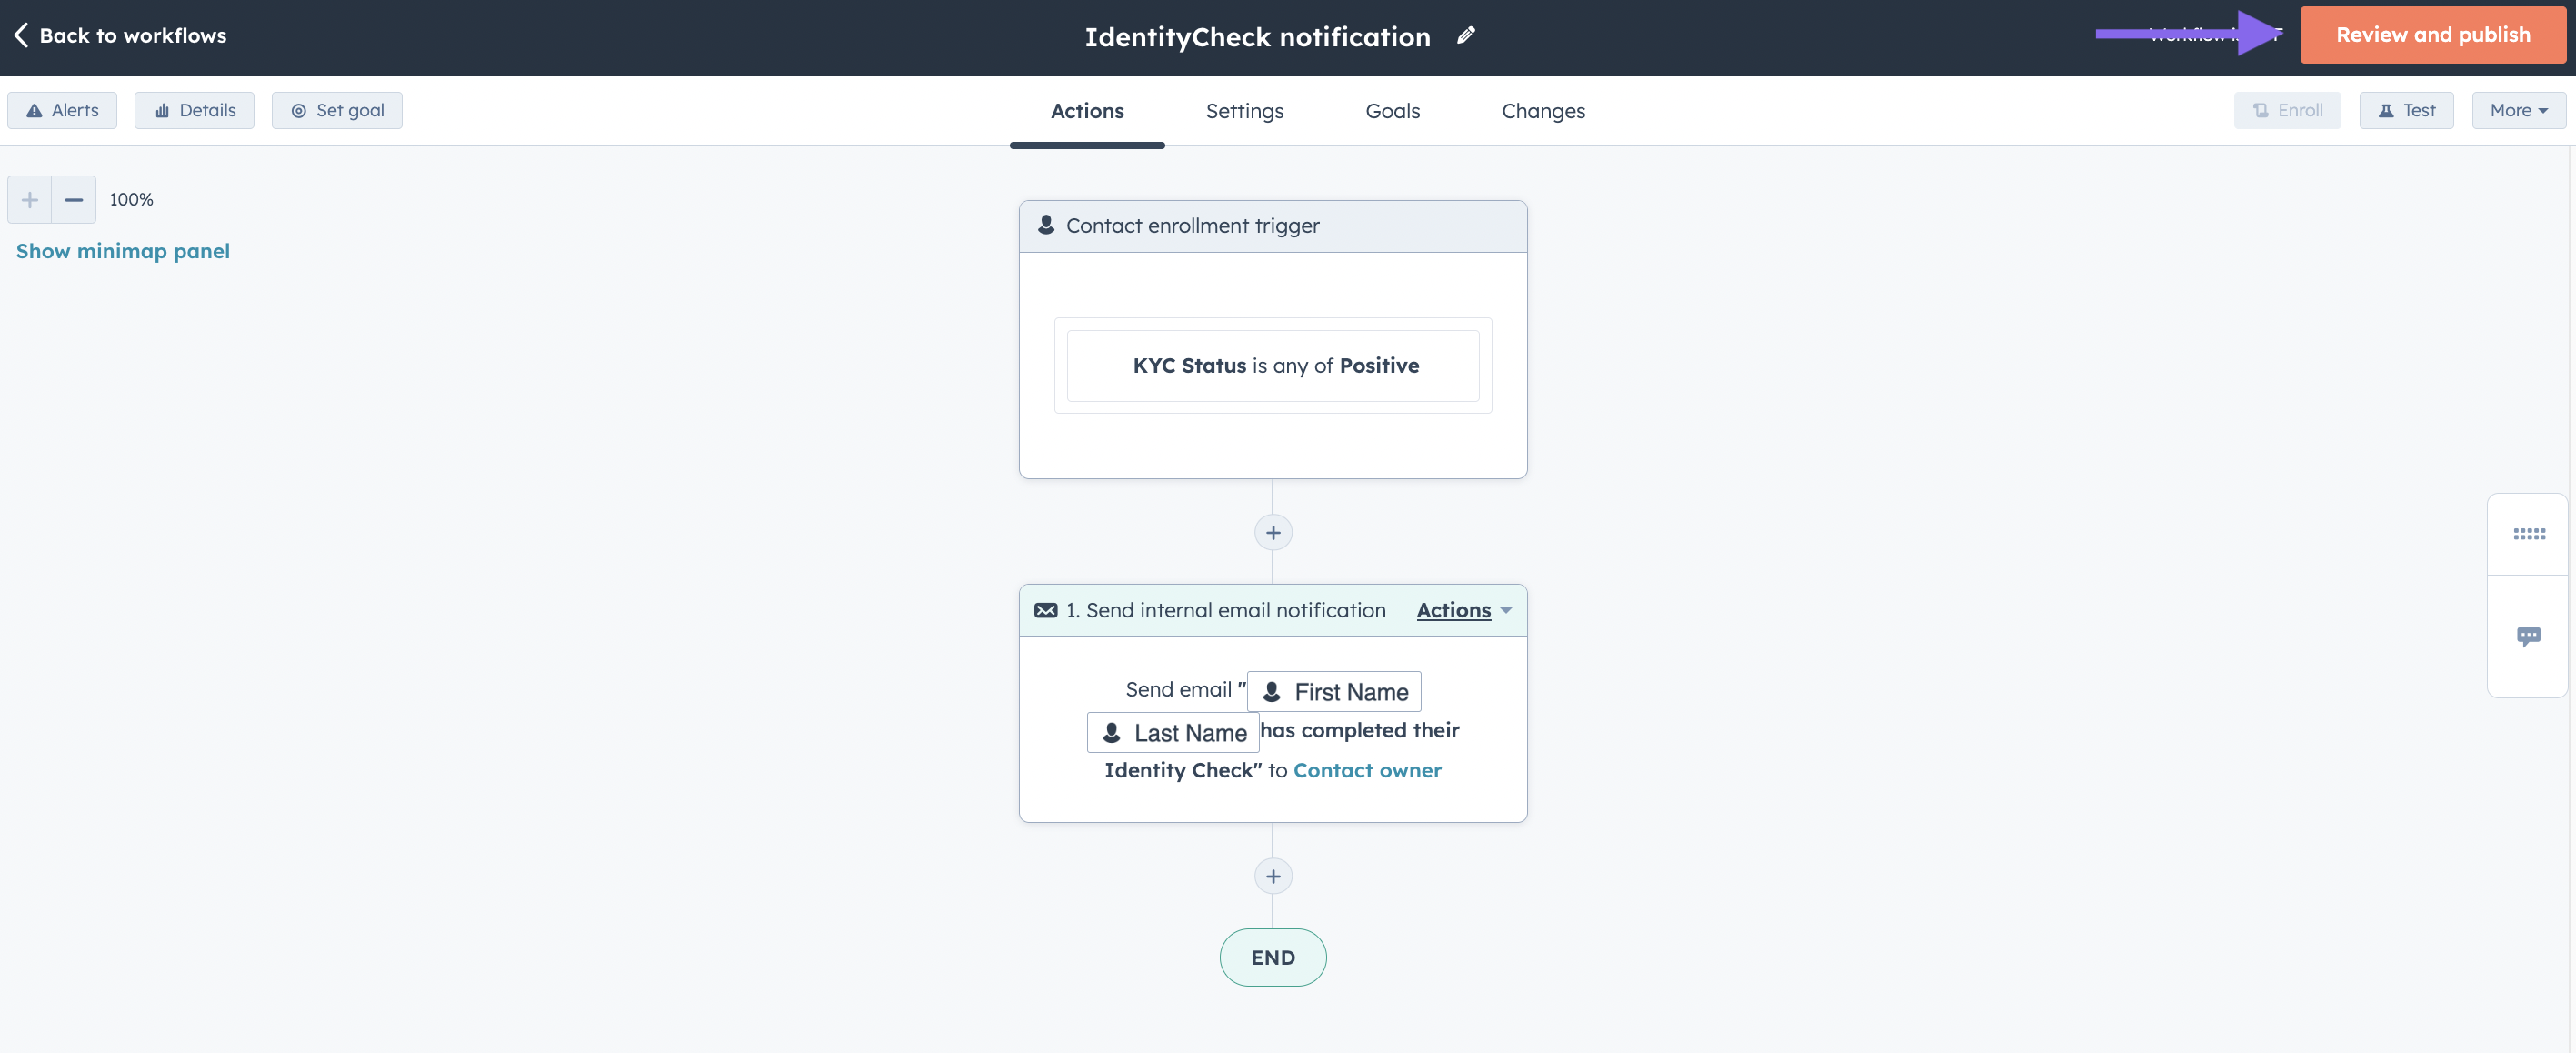
Step 5: Choose “KYC Status” = “Positive” from Contact Properties
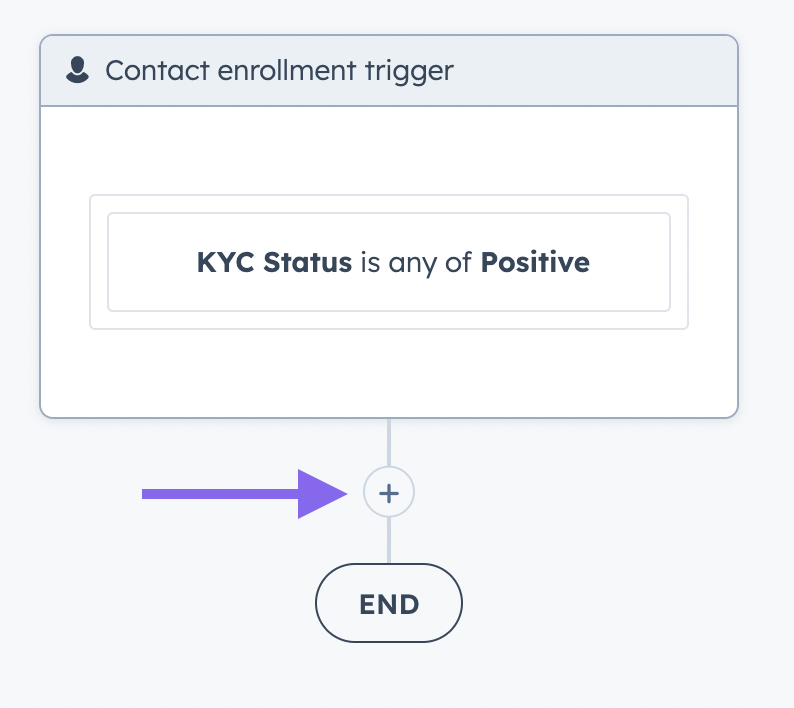
Step 7: Add an action
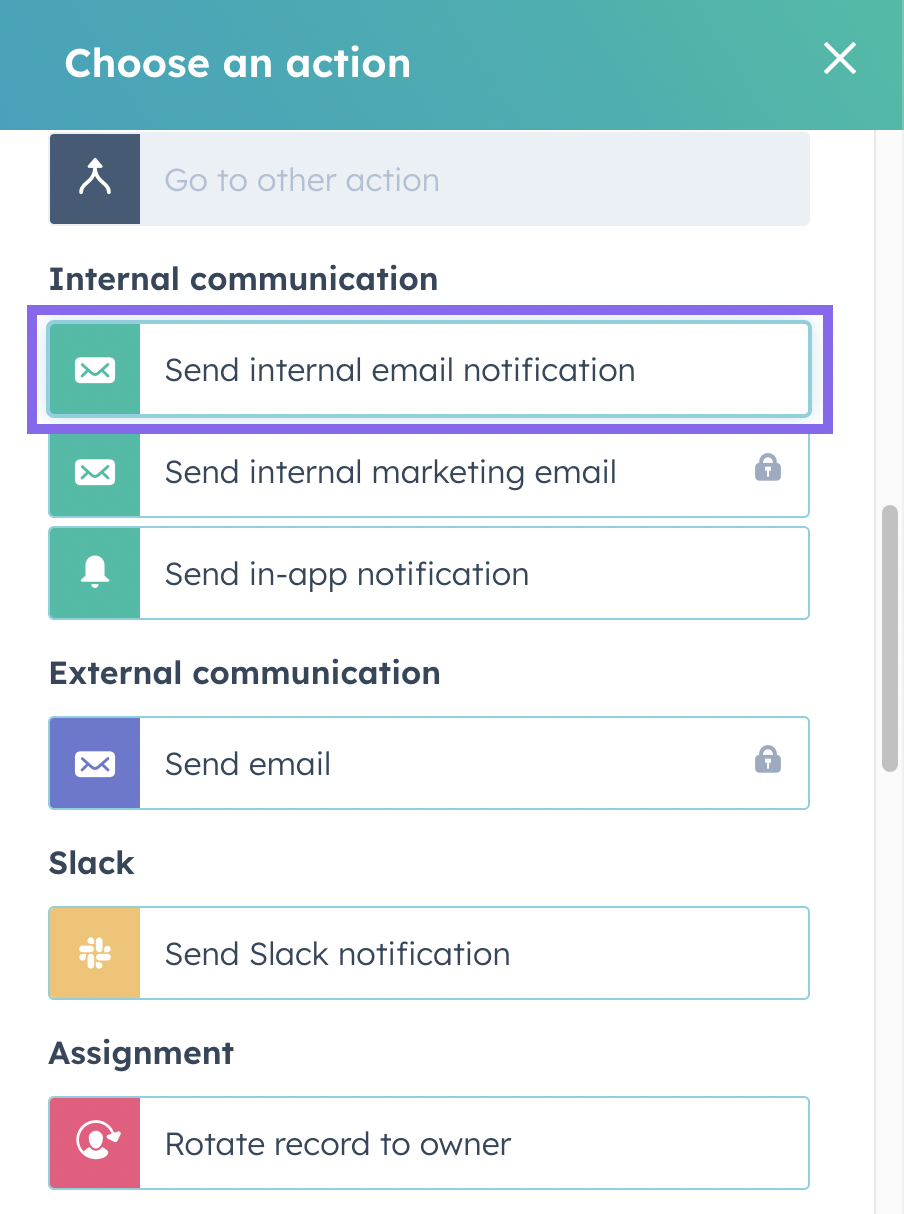
Step 8: Select “Send internal email notification”
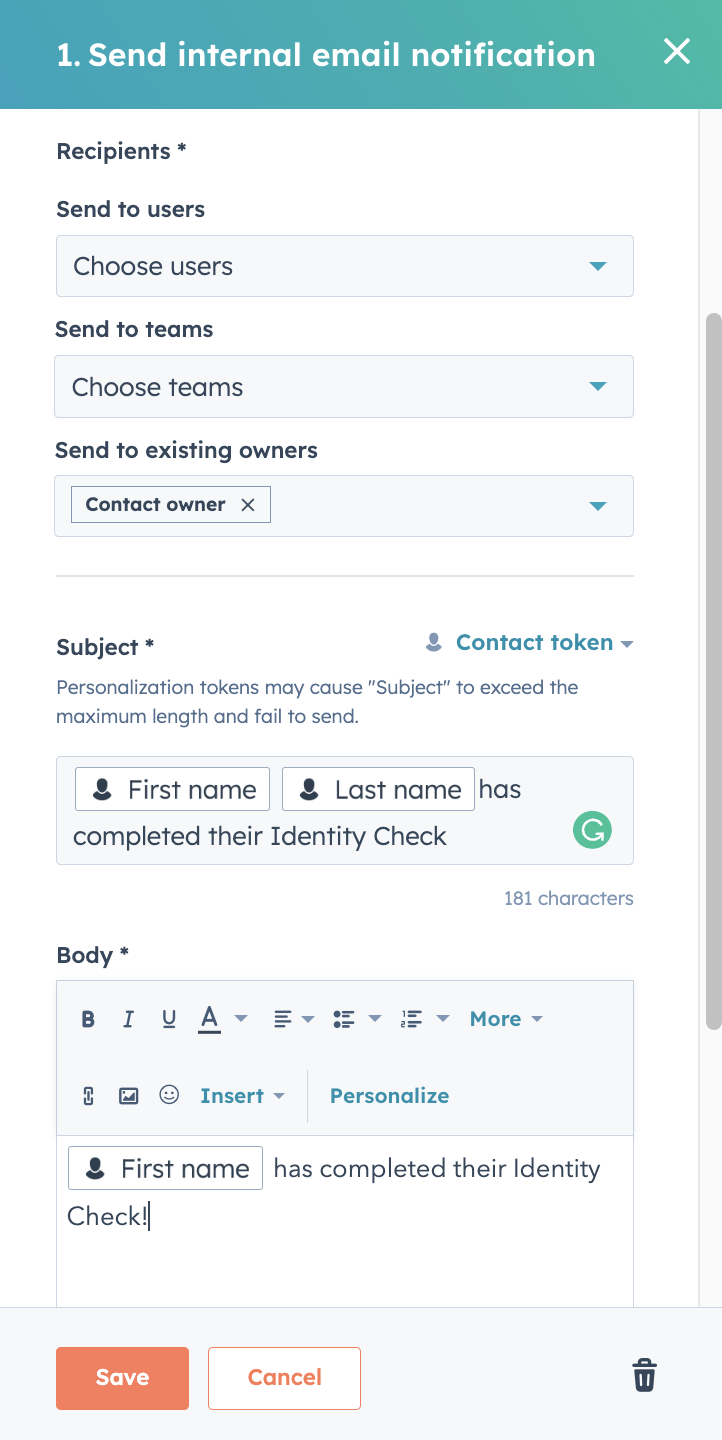
Step 9: Choose email recipients and message body
Choose from static or dynamic recipients (e.g. “contact owner), and your email message subject and body. You can personalise the email notification with fields from the Contact record (e.g. first / last name).
Step 10: Review and Publish the workflow
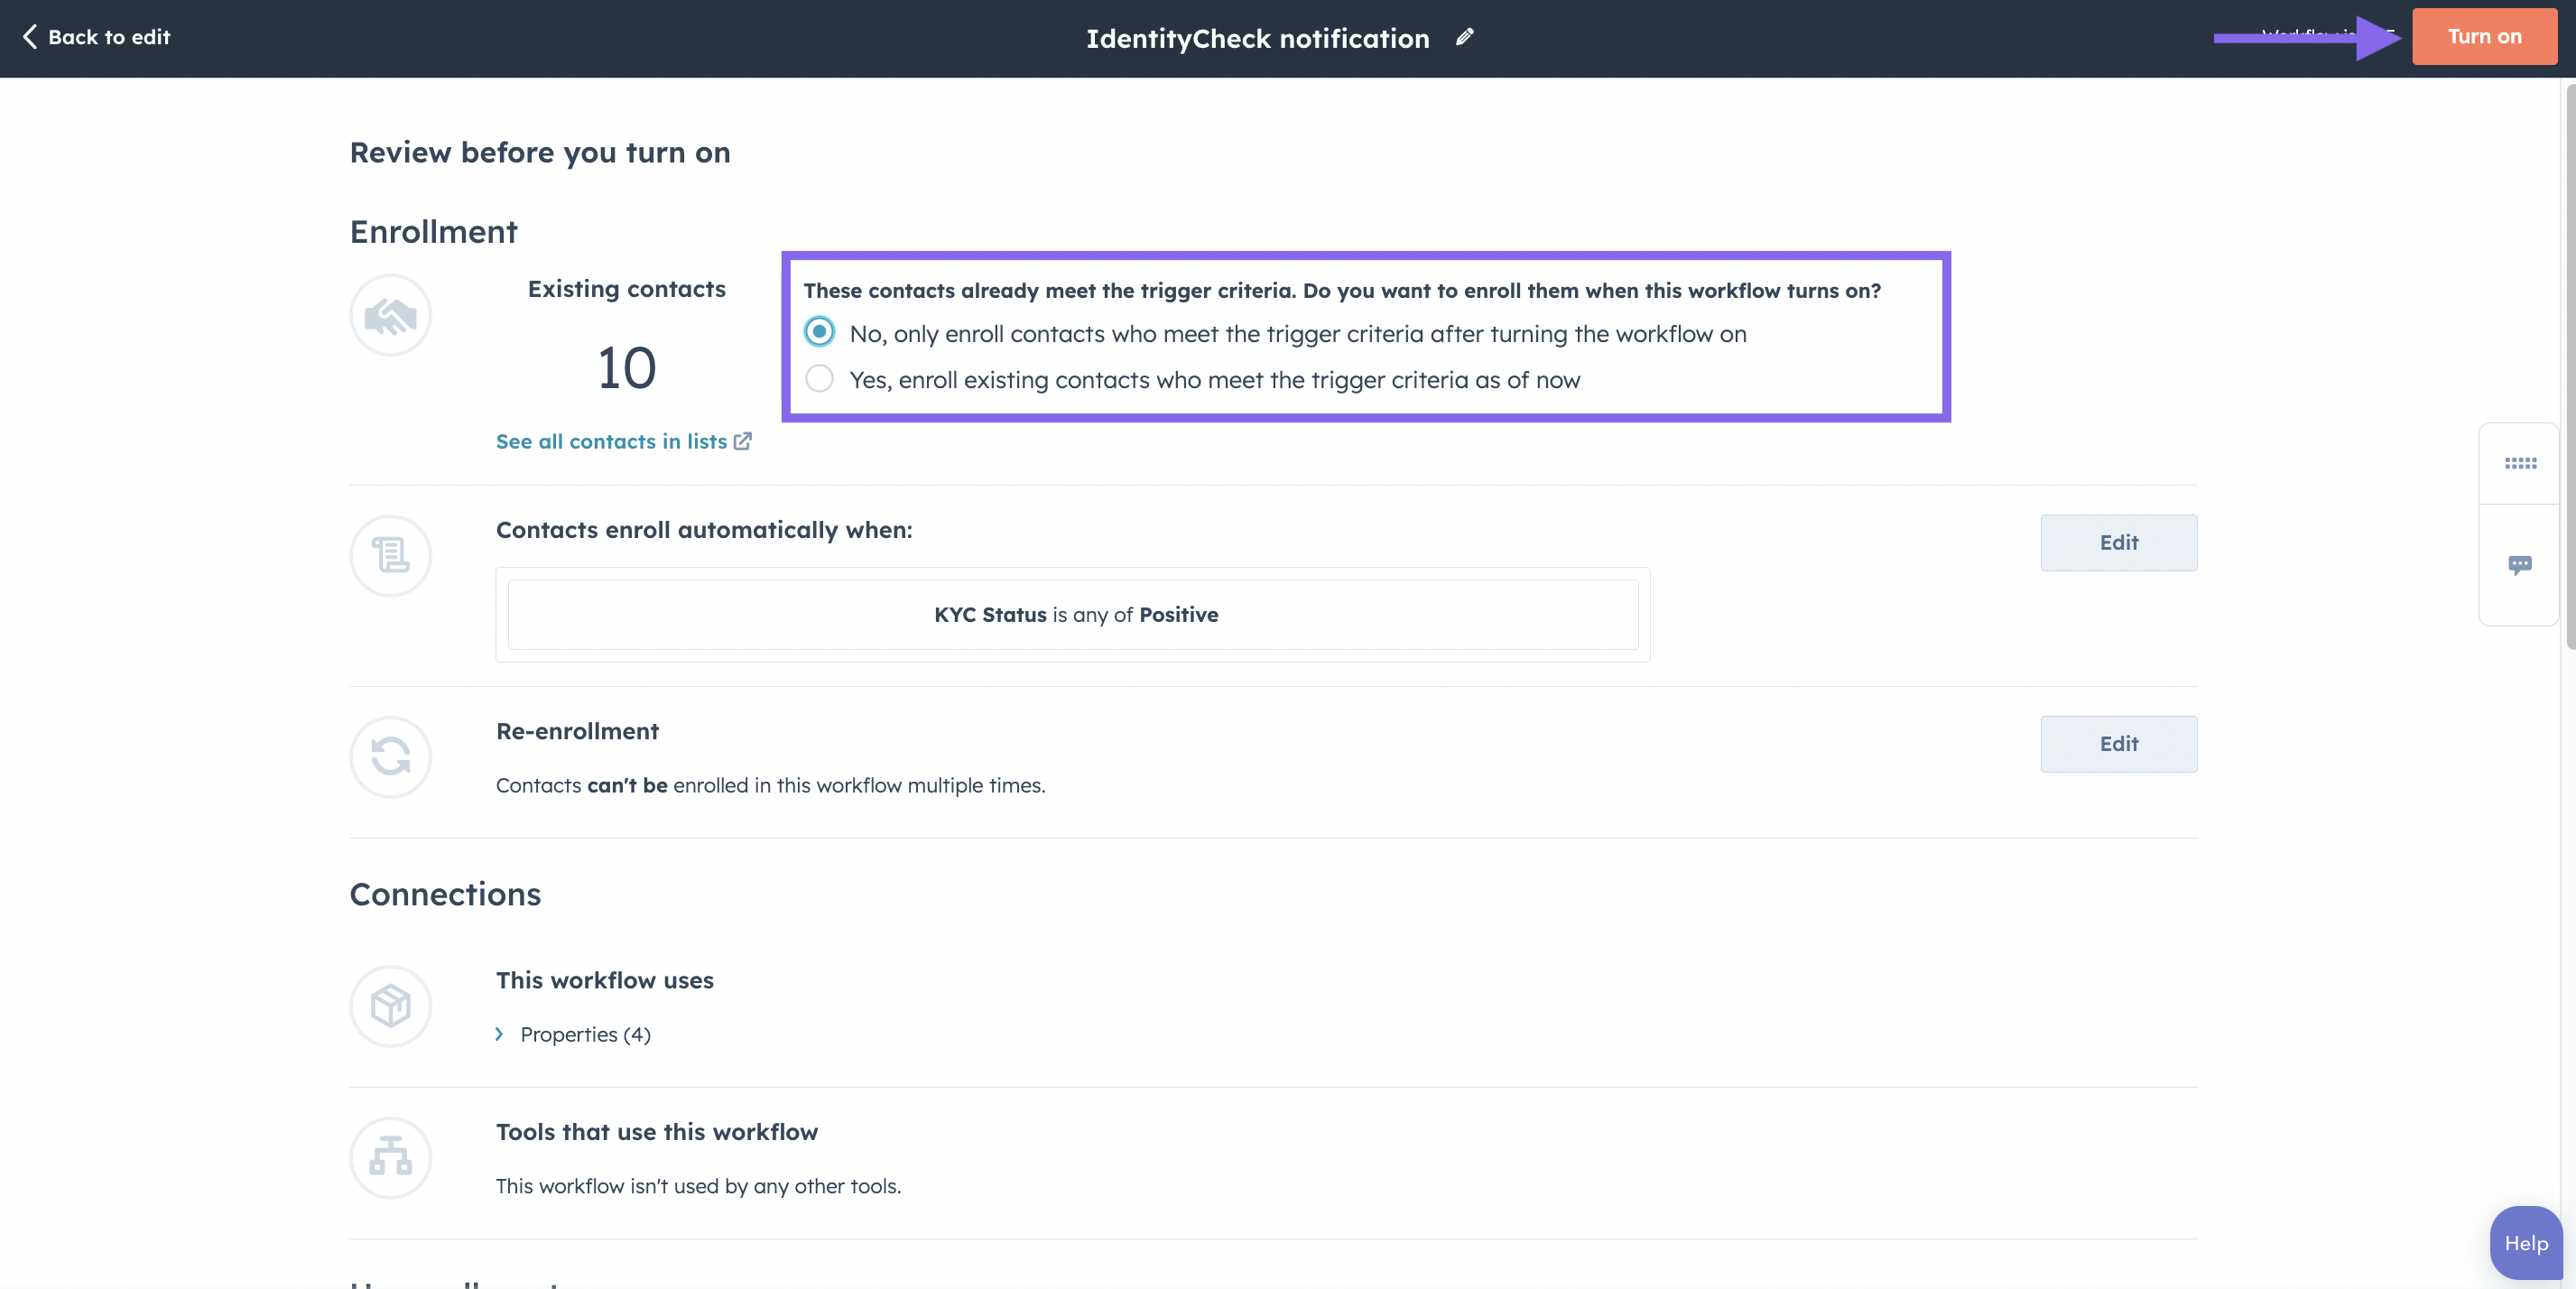
Step 11: Review settings and turn on workflow!
You need to choose if you want to enroll existing contacts that already meet the criteria, or only new ones once the workflow is switched on.
Conclusion
That’s it! We recommend doing some tests and checking out the Workflow dashboard in HubSpot for more debugging if required.
Contact us if you run into any issues or have other feedback.


