What makes HubSpot a great integration choice
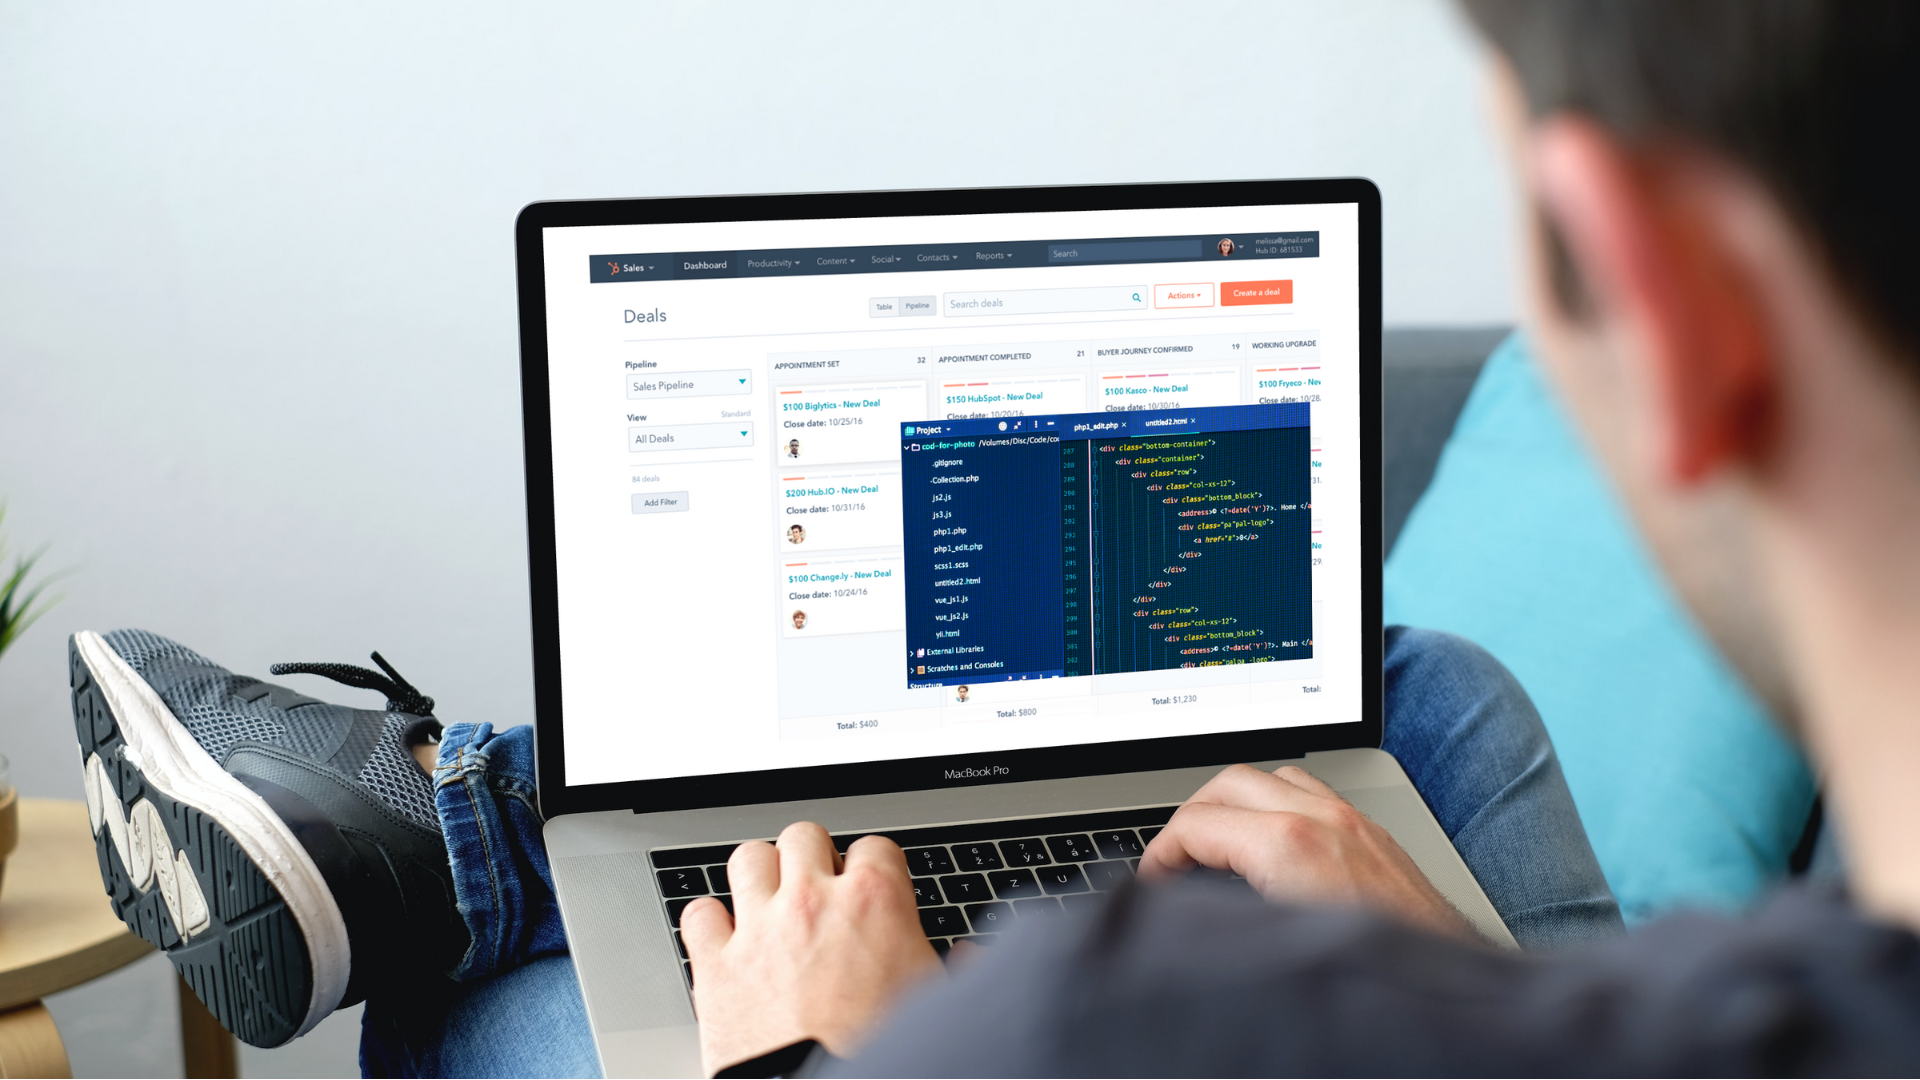
With over 143,000 customers in over 120 countries, HubSpot is a leading provider of customer engagement tools. Over the years, their product suite has matured from a customer relationship management tool to a full customer engagement offering, including tools to help marketing, customer service, and sales teams. To support such a large and varied customer base, they’ve provided developers with API endpoints to help manage HubSpot instances and keep them aligned with the other tools used by the organization.
In this article, we explore how to use the HubSpot API to build productized integrations.
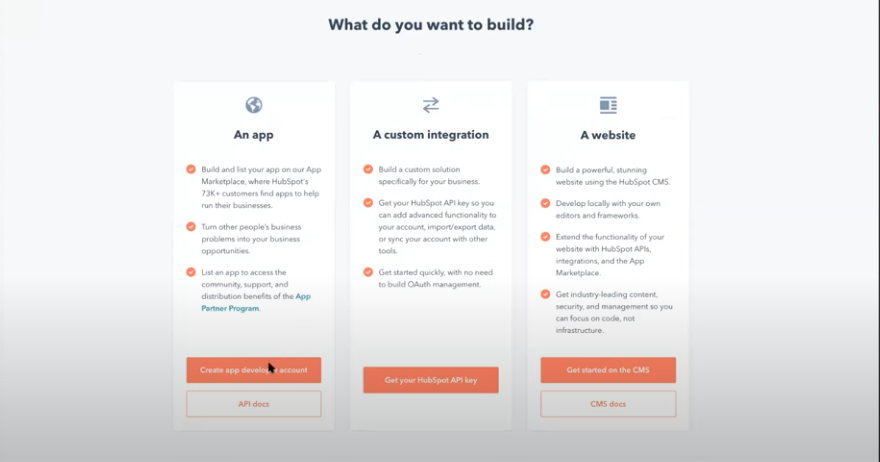
Step 1. Sign up for a developer account – https://developers.hubspot.com
1.1 Choose An App and continue
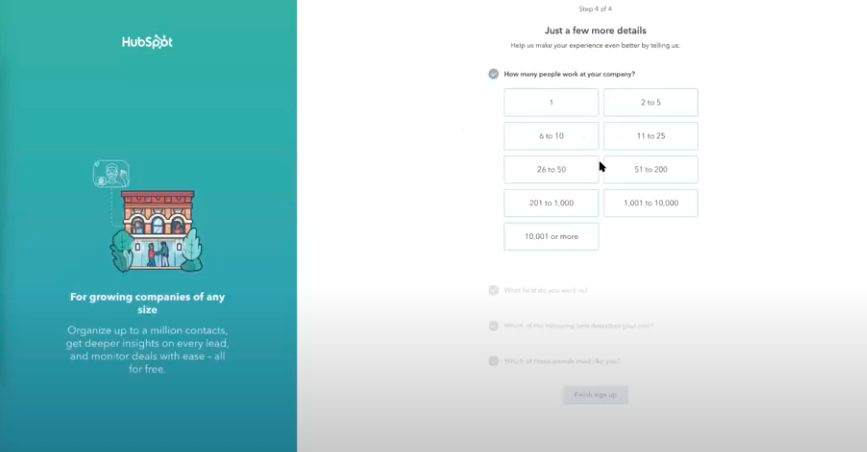
1.2 Complete the signup form
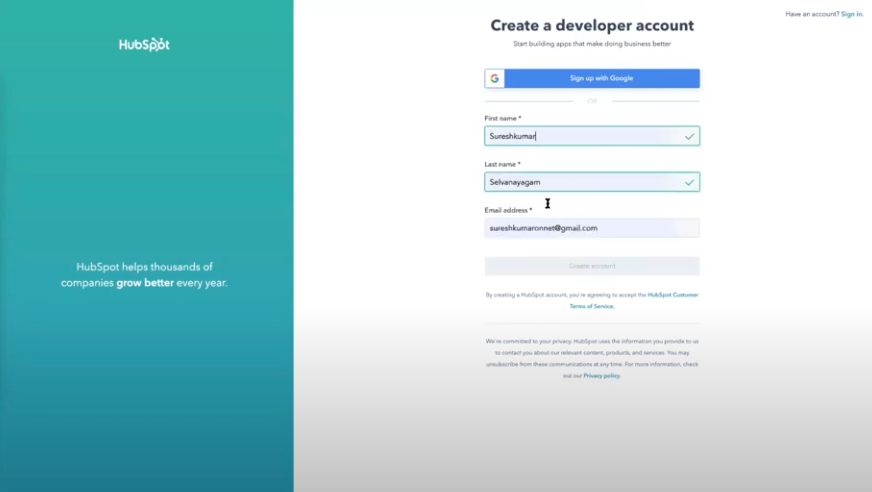
Hint: you might have to verify your email by clicking on an email link
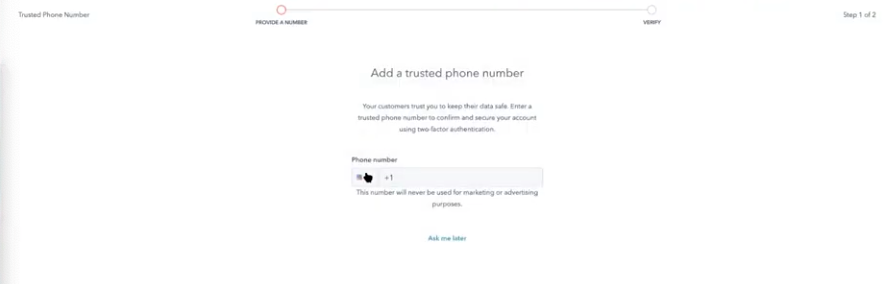
1.3 Provide a phone number for 2FA or skip
1.4 Fill in company details
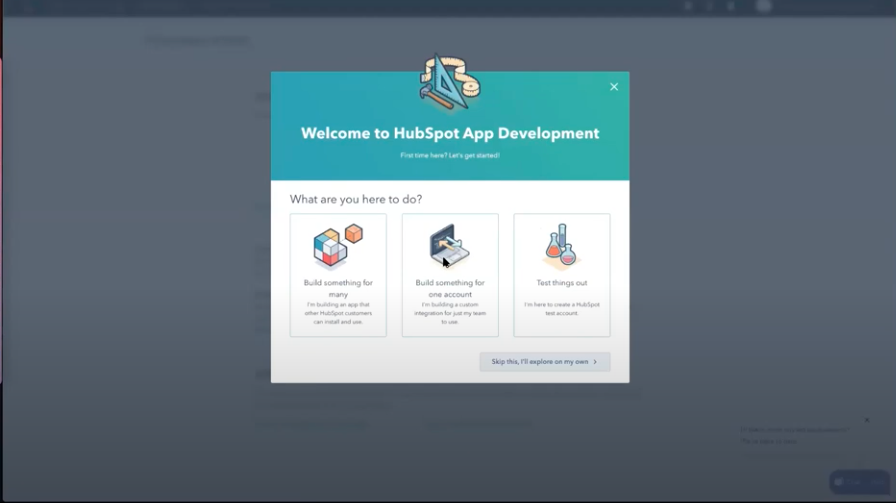
1.5 Select Build something for many on the welcome screen
1.6 Go to Basic info > Auth to see the App Credentials
Hubspot by default creates an app called MyHubspotApp and we can use that for this example.

1.7 Select a few scopes related to forms or contacts

2. Start Building (if you are a StackGo customer, skip to step 3)
To start building an OAuth API connection to your app you need to handle the following (at a high level):
- Work out the appropriate scopes required for the production version of the app, which might be different from the above.
- Generate install authorization links ensuring correct HTTP encoding format.
- Use
stateorcode_challenge to enhancesecurity and prevent man-in-the-middle attacks. - Create a secure local token endpoint for testing in development using a service like localtunnel, ngrok, serveo or pagekite.
- Add the endpoint to the HubSpot Developer account.
- Add logic to securely handle the token endpoint with handling to state and/or code_challenge.
- Secure the endpoint for DDoS and origin filtering to ensure hackers do not exploit the vulnerable public endpoint.
- Securely generate the install url for each user session.
- Complete with the database schema redesign to hold the tokens that are supplied by HubSpot with each associated user.
- Take care and effort to blank tokens of production customers from appearing in logs, caches and other non-secure locations. If not, consider adding super admin privileges to reduce access.
- Work on a token refresh strategy that will ensure that tokens remain as per the HubSpot documentation.
- Start work on classifying the workflow for your integration:
- By data flow
- One way sync
- Two-way sync
- By type of data flow
- Batch mode
- Real-time
- Aggregation
- Event mode
You can skip the above steps by creating a StackGo account.
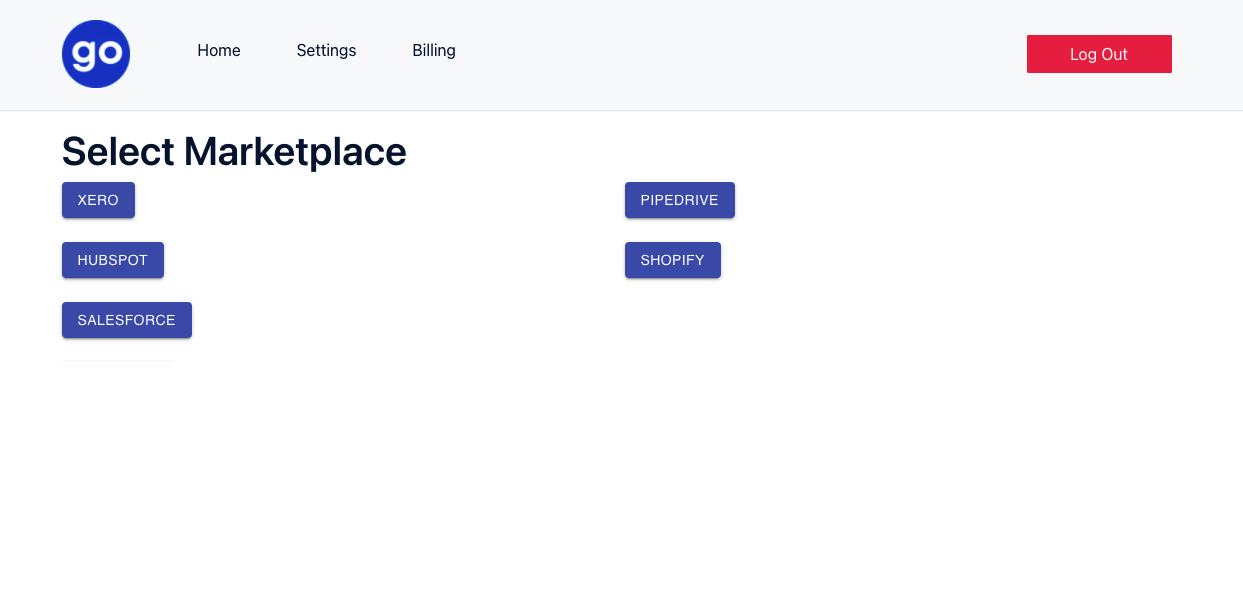
3. Pass credentials to StackGo Platform
Open StackGo (https://app.stackgo.io/select-marketplace) (assuming you are logged in).
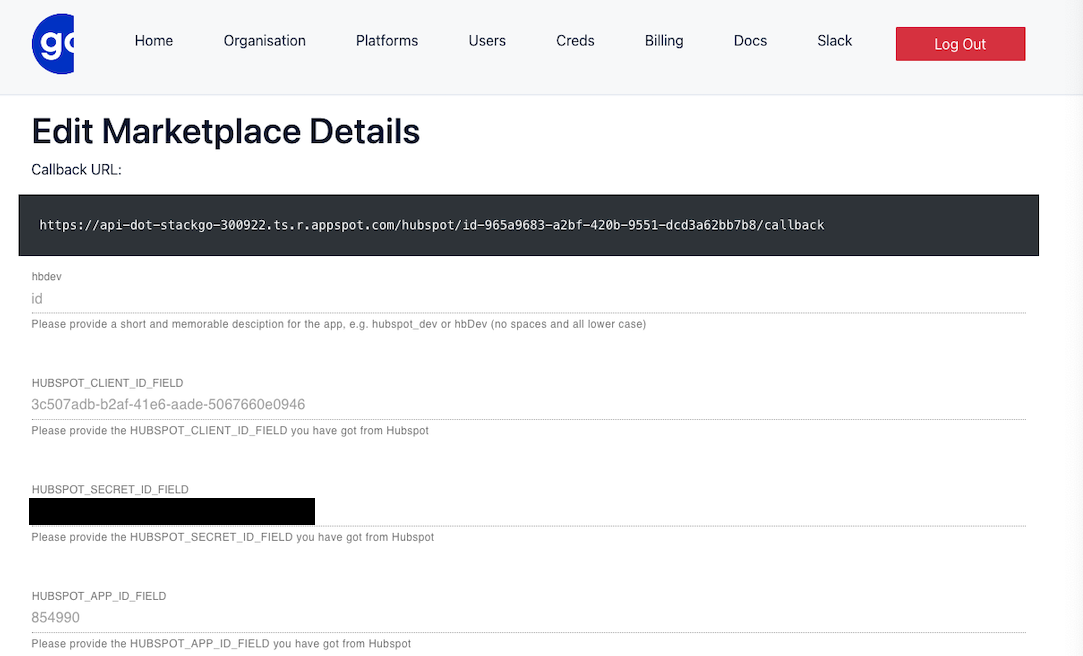
Pick a short name for your integration – such as hbdev.
Copy and paste the HubSpot app page, called Client ID, Client Secret and App ID to Stackgo fields Client Id, Client Secret and App Id. Pay extra attention to ensure the values are not pasted in the wrong fields.
Select the same scopes as you did on HubSpot from the dropdown list.
4. Update HubSpot Redirect URL with the StackGo-generated URL
This will allow StackGo to execute the OAuth dance on your behalf.
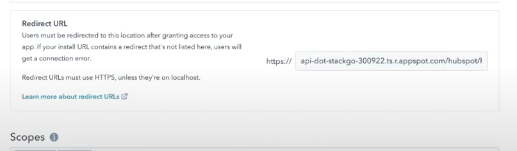
Hit save and you are set!
5. Register your HubSpot customer with StackGo
If you haven’t already generated the StackGo credentials, see 🔑Requesting your StackGo Authentication Tokens.
Now to activate the HubSpot connection, we will follow a simple process that showcases the power of StackGo. As the app developer, you can recreate that within your platform and start unleashing integration use cases!
5.1 Generate the install link with user foreign identifier
The code to generate the HubSpot install link will be as follows:
curl --location --request GET 'https://api-dot-stackgo-300922.ts.r.appspot.com/api/hubspot/auth/hbDev?userForeignIdentifier=<user id>' \ --header 'Authorization: Bearer <your StackGo Auth token>'userForeignIdentifier is a simple 1:1 mapping of your user – put any UUID or string here that you use to refer to your users.
hbdev is the appslug that we selected in Step 3 along with the token to authenticate users.
The response from that API will be of the shape:
{ "url": "https://app.hubspot.com/oauth/authorize?client_id=fcdc0161-59d5-428f-864f-629d8aa781ec&scope=contacts%20forms&redirect_uri=https%3A%2F%2Fapi-dot-stackgo-300922.ts.r.appspot.com%2Fhubspot%2Fhbdev-9804bf30-ca1b-4716-ad64-b5d84f10d98f%2Fcallback&state=fasdfkjlsvieve3294032490fdsfu90324u9r02uf092uf092u09348f", "userForeignIdentifier": "[email protected]", "UUID": "9804bf30-ca1b-4716-ad64-b5d84f10d98f" }This install link is the action behind the Connect to Hubspot button or similar. You can simulate a user clicking on that button by opening the url in a browser window.
It will take you to the HubSpot page, if you were logged in it will take you to the Authorization Page where the user can authorize access to their HubSpot data.
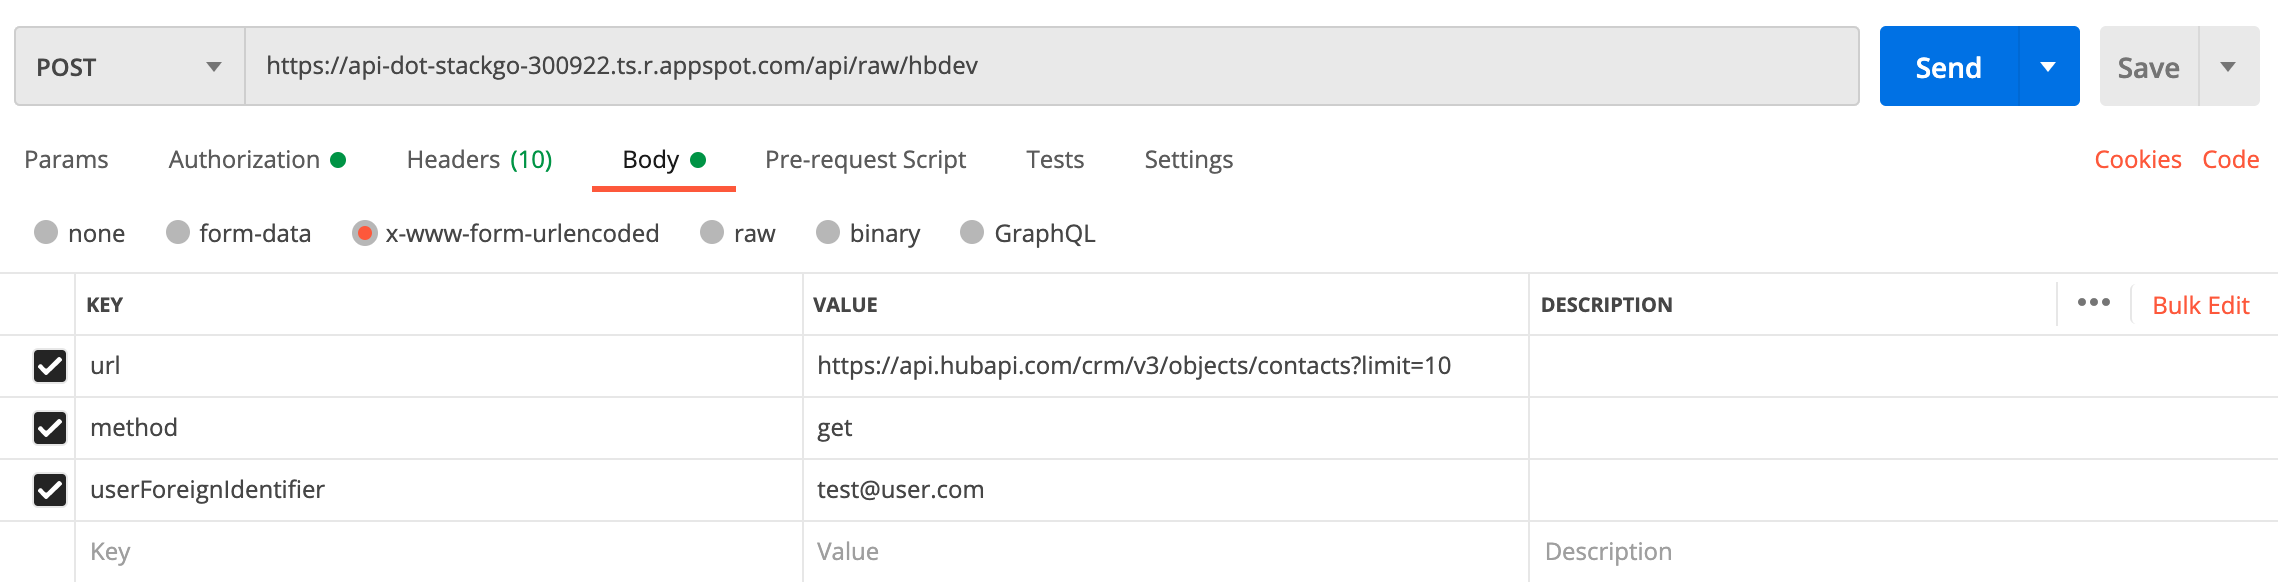
6. Use StackGo as a proxy
With the user authorization complete, you can use StackGo as a proxy to access the HubSpot API.
Essentially it is a POST request to StackGo with the same userForeignIdentifier that was registered. You provide the HTTP method and the URL you want to access on the HubSpot side.
StackGo attaches the appropriate tokens and attempts to query the platform on your behalf and transparently passes the results back to you.
To execute a POST request you can pass through another option for the body that has the data to be associated with the request.
We hope you found this guide useful. If you have feedback or questions, please contact us.


