
Every new client relationship starts with onboarding, and how you handle it sets the tone for everything that follows. If you’re using HubSpot as your CRM, you’ve already got a solid foundation. But turning it into a proper HubSpot client onboarding machine takes deliberate setup: the right pipelines, automated workflows, and a clear process that doesn’t rely on someone remembering to send an email or chase a document. Most teams never get past the basics, which means dropped tasks, inconsistent experiences, and wasted hours on manual follow-ups.
The good news is that HubSpot’s workflow engine is genuinely capable, once you know how to configure it properly. This guide walks you through building automated onboarding workflows from scratch, covering pipeline setup, task automation, and the practical steps that turn a messy welcome process into something repeatable. Whether you’re onboarding five clients a month or fifty, the principles are the same.
For regulated businesses, accountants, financial services, legal firms, onboarding also means identity verification, KYC/AML checks, and compliance steps that most CRMs don’t handle natively. That’s exactly the problem we built StackGo’s IdentityCheck to solve: it plugs directly into HubSpot so you can verify client identities without leaving your CRM or juggling separate platforms. We’ll touch on where compliance automation fits into your onboarding workflows as we go.
What client onboarding looks like in HubSpot
HubSpot doesn’t have a dedicated "onboarding" module out of the box. Instead, HubSpot client onboarding is built from a combination of objects, pipelines, workflows, and tools that you configure to suit your process. Most teams use either the Deals pipeline or the Tickets pipeline as the backbone of their onboarding flow, assigning stages that mirror the milestones a new client moves through from signed contract to fully activated account.
The objects that power onboarding
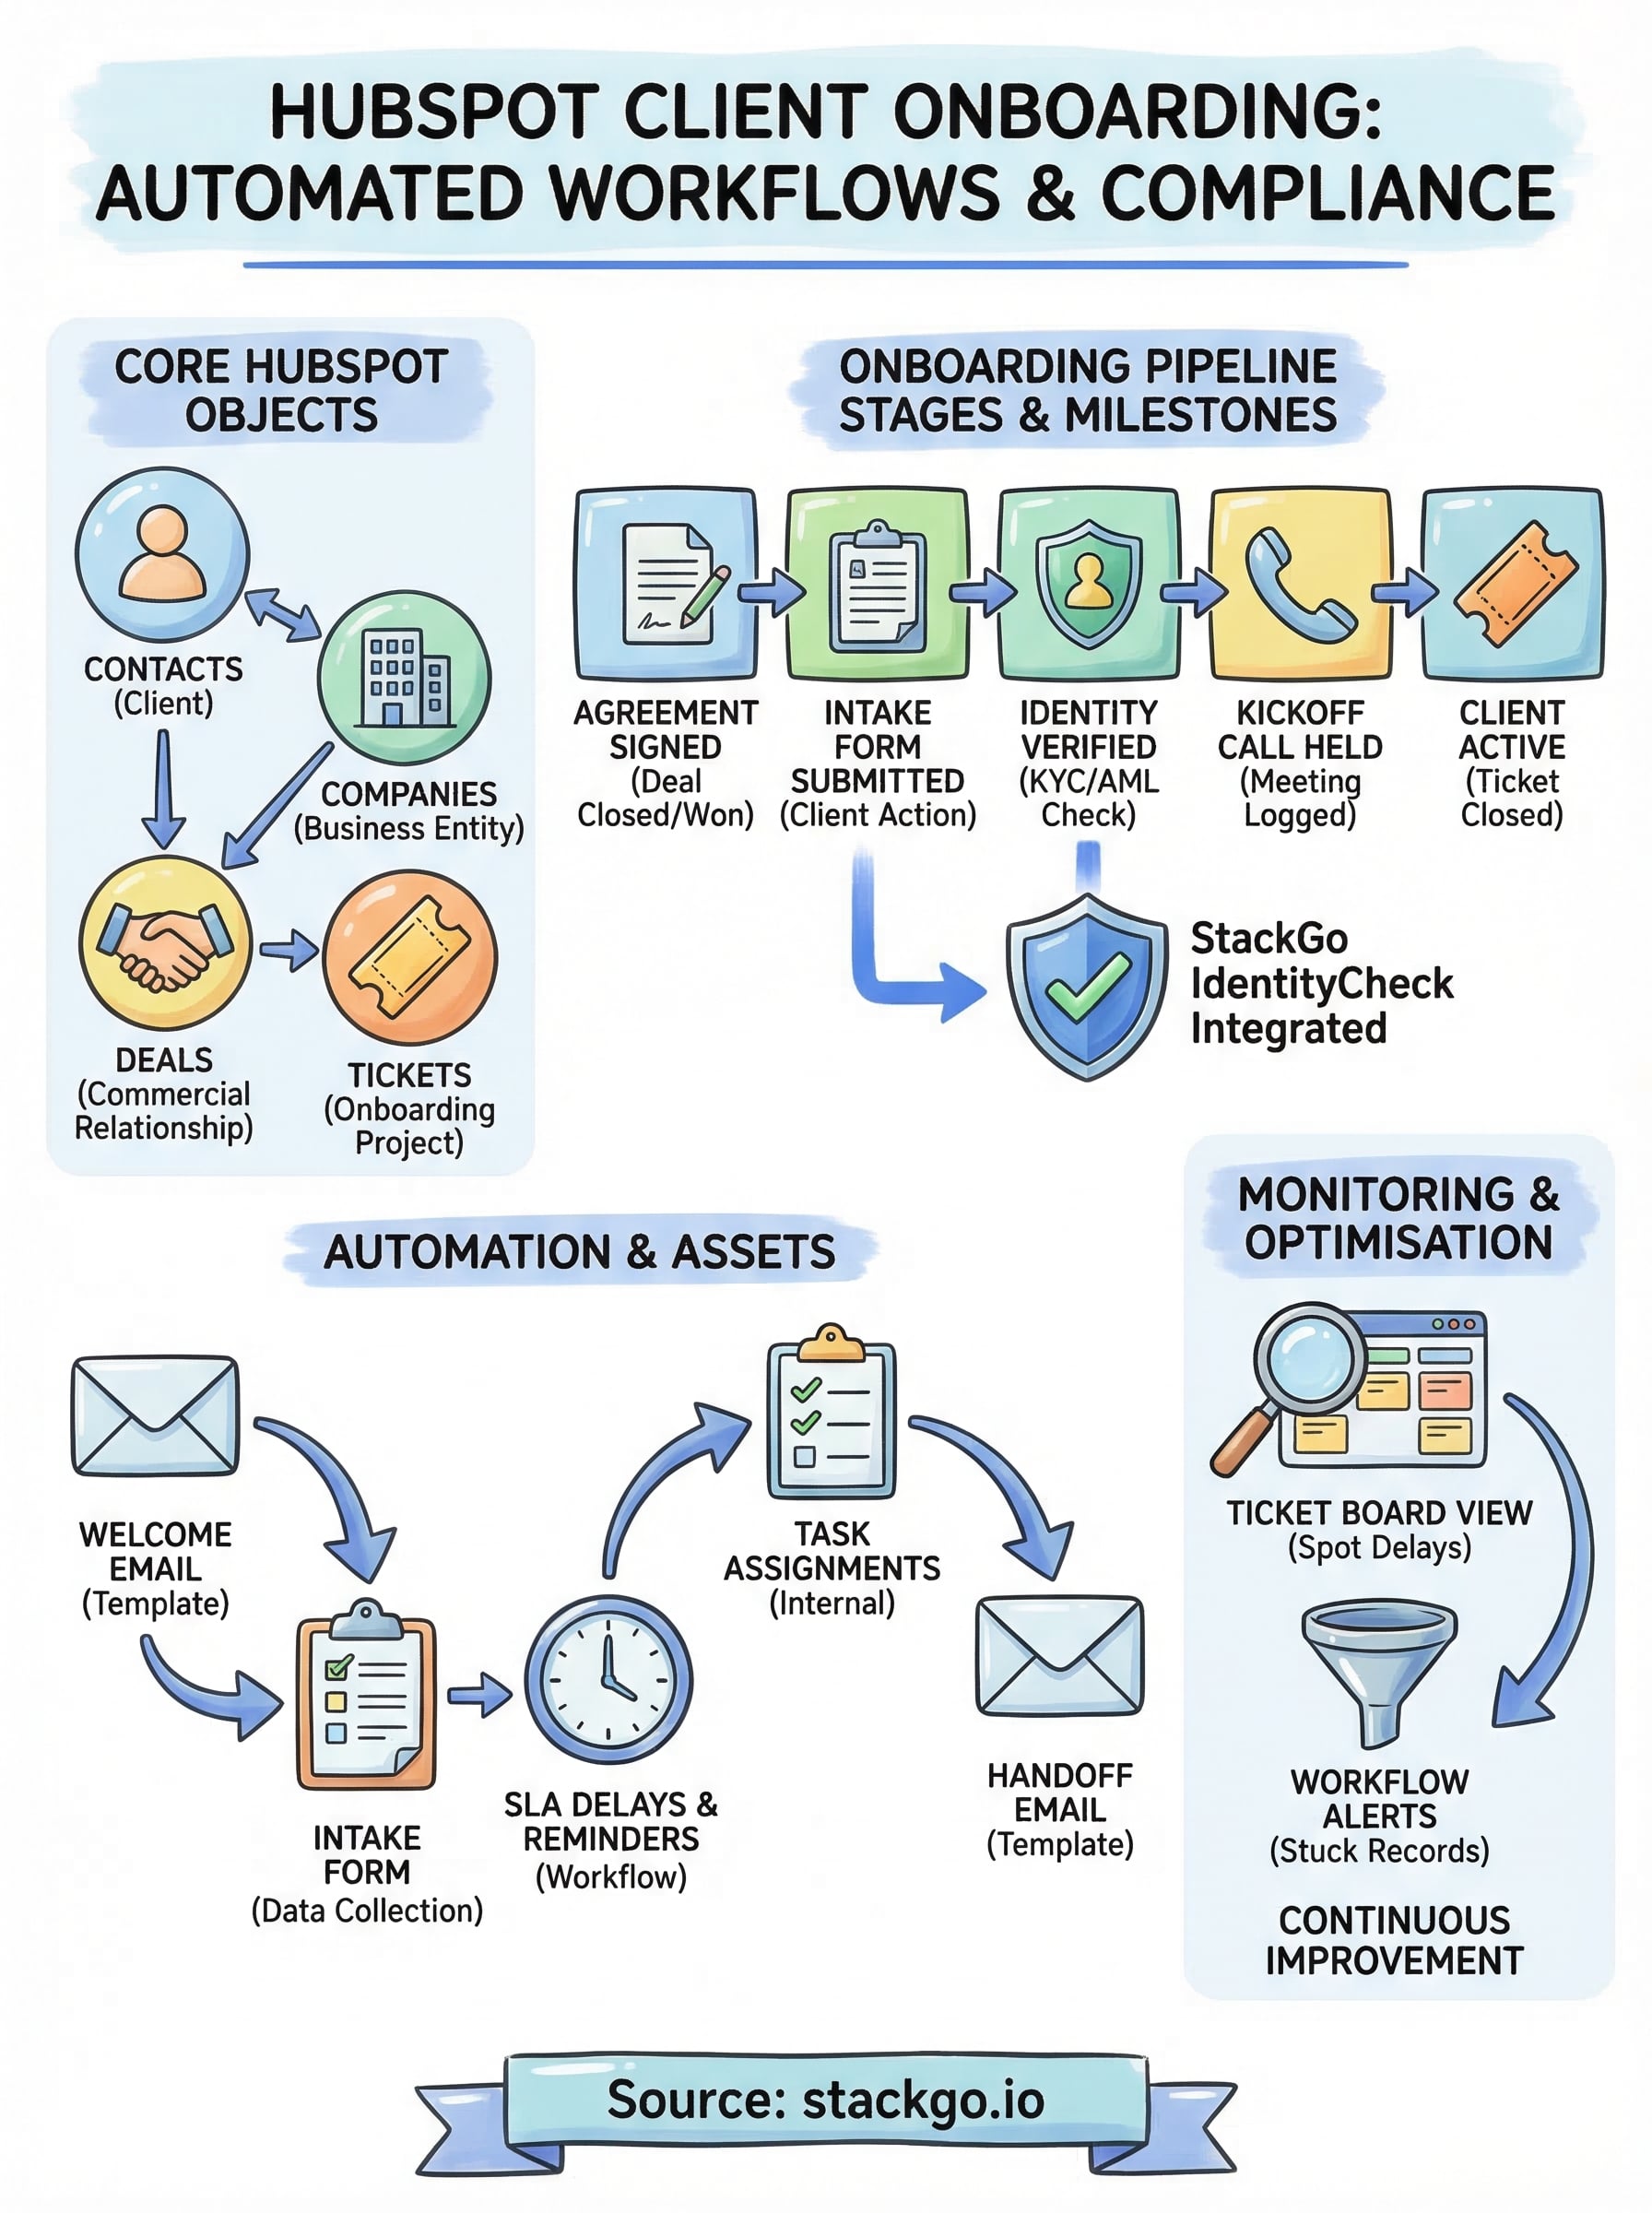
HubSpot organises everything around four core objects: Contacts, Companies, Deals, and Tickets. For onboarding, you’ll typically use all of them at once. A Contact represents the individual client, a Company holds the business they belong to, a Deal tracks the commercial relationship, and a Ticket can represent the onboarding project itself. Associating these objects correctly from the start is the single most important structural decision you’ll make, because it determines what data flows where and what your automations can trigger on.

Here’s how a basic object structure looks for a professional services onboarding:
| Object | Role in onboarding |
|---|---|
| Contact | The individual client being onboarded |
| Company | Their business entity |
| Deal | Closed/won sale that triggers onboarding |
| Ticket | The onboarding project with its own pipeline stages |
Pipelines and stages
HubSpot pipelines give you a visual board where each column represents a stage in the process. For onboarding, a typical pipeline might include stages like Agreement Signed, Welcome Email Sent, Documents Collected, Kickoff Complete, and Client Active. Each stage can trigger automations, send notifications, or assign tasks to your team based on conditions you define.
The cleanest onboarding setups use a dedicated Ticket pipeline that sits separate from your sales pipeline, so your deals don’t clutter the post-sale view.
You move a Ticket from stage to stage either manually or automatically based on conditions you set in the workflow builder. For example, once a client submits a required form, a workflow can automatically advance the Ticket and assign a follow-up task to an account manager. This is where HubSpot’s automation engine starts to earn its keep.
What HubSpot handles natively
Out of the box, HubSpot handles a lot: email sequences, internal task assignments, document collection via forms, meeting scheduling, and deal-stage automation. For straightforward onboarding processes, this is often enough. You can build a functional, automated onboarding flow using only tools that come with a HubSpot Professional or Enterprise subscription.
The limits start to show when your onboarding includes compliance-specific steps. HubSpot doesn’t natively support identity verification, KYC checks, or AML screening. It also doesn’t restrict how PII is stored across contact records in a way that meets stricter regulatory standards. For businesses in accounting, financial services, or legal, these gaps matter, and they need purpose-built integrations rather than manual workarounds or Zapier-style automations that introduce their own reliability risks.
Where the gaps appear
Custom properties and associations can patch a lot of gaps, but they require deliberate planning upfront. If you try to bolt on new fields or stages after onboarding is already running, you’ll likely break existing automations or create data inconsistencies that are hard to untangle. The sections that follow cover exactly how to plan your object structure before you build anything, so you’re not rebuilding the foundation six months down the track.
Plan your objects, properties, and permissions
Before you touch a single workflow, spend time mapping out your data architecture. Skipping this step is the most common reason onboarding automations break down after a few months: someone adds a field in the wrong place, a workflow triggers on the wrong object, and suddenly you’re debugging instead of onboarding clients. Getting your object relationships, custom properties, and team permissions locked in early saves a significant amount of rework later.
Define your object structure first
Your first decision is which object owns the onboarding record. Most businesses running HubSpot client onboarding use a Ticket for the onboarding project, associated with the Deal that closed it, the Company, and the relevant Contact. This separation keeps your sales pipeline clean while giving onboarding its own distinct set of stages and automations.
Make sure every Ticket is associated with its parent Company record, not just the Contact. This matters because many onboarding workflows need to reference company-level data (ABN, industry, account manager) that lives on the Company record rather than the individual.
| Association | Why it matters |
|---|---|
| Ticket → Deal | Traces onboarding back to the sale |
| Ticket → Company | Gives workflows access to business-level data |
| Ticket → Contact | Connects tasks and emails to the right person |
Build custom properties for onboarding data
Standard HubSpot properties won’t cover everything your onboarding process needs. Create custom properties on the Ticket object to track onboarding-specific data: document status, KYC outcome, kickoff date, and assigned account manager. Keep these on the Ticket rather than the Contact so they stay scoped to a specific onboarding event, not the client’s entire history.
Build a naming convention for custom properties before you start, for example using "OB_" as a prefix, so onboarding fields are immediately identifiable inside the workflow builder.
Set team permissions before going live
HubSpot’s permissions system lets you control who can view, edit, or delete records and properties. For onboarding, set view-only access for team members who only need to check status, and restrict editing to the roles responsible for moving stages forward. If your process includes sensitive client data, use property-level permissions (available on Enterprise) to limit who sees fields like identity verification outcomes or uploaded documents. This keeps your data clean and your audit trail intact.
Step 1. Map your onboarding journey and milestones
Before you build anything in HubSpot, map out every step your client experiences from the moment they sign. This exercise is the foundation of your entire HubSpot client onboarding setup, because workflows can only automate what you’ve already clearly defined. If your process lives in someone’s head or a shared notes document, pull it into a structured format you can actually build from.
List every client-facing touchpoint
Start by writing down every action that involves your client directly, not internal tasks, just the moments where your client receives something or needs to do something. A typical professional services onboarding includes a welcome email, a document request, a kickoff call, an identity verification step, and a confirmation that their account or service is active. Walk through your last three onboardings and note every email sent, every form submitted, and every meeting held.
If you can’t map three onboardings consistently, your process isn’t ready to automate. Fix the inconsistency first, then build the workflow.
Once you have your list, group touchpoints into logical phases that will eventually become your pipeline stages. Three to five phases is usually the right range. Too many stages create noise; too few make it hard to spot where clients are getting stuck before you can intervene.
Define milestones, not just tasks
Milestones are outcome-based markers that tell you a phase is genuinely complete, not just that a task got ticked off. The distinction matters because HubSpot automations trigger on conditions, and "sent welcome email" is a weaker trigger than "client submitted onboarding form." Design your milestones around client actions or verified outcomes rather than internal activities wherever possible.
Use this template to map each phase before you build anything in HubSpot:
| Phase | Milestone (trigger to advance) | Owner |
|---|---|---|
| Agreement signed | Deal marked Closed Won | Sales |
| Documents collected | Client submits intake form | Operations |
| Identity verified | KYC check completed and passed | Compliance |
| Kickoff complete | Meeting logged in HubSpot | Account manager |
| Client active | Onboarding ticket closed | Operations |
Fill this in for your own process before moving to the next step. The cleaner your milestone definitions, the less manual intervention your workflows will need to compensate for later.
Step 2. Build an onboarding pipeline in HubSpot
With your milestones defined, you’re ready to build the actual pipeline inside HubSpot. This is where your onboarding journey becomes a structured, visible board that your whole team can work from. A well-configured pipeline is the operational core of any HubSpot client onboarding setup because it controls what automations fire, when tasks get assigned, and how you track progress across every active client.
Create a dedicated Ticket pipeline
Navigate to Settings > Objects > Tickets > Pipelines and create a new pipeline specifically for onboarding. Name it clearly (for example, "Client Onboarding") so it sits distinctly apart from any support or service pipelines you already use. Avoid reusing your sales pipeline for this purpose because mixing sales stages with onboarding stages creates reporting confusion and makes your workflow triggers significantly harder to manage cleanly.
Keep your onboarding pipeline entirely separate from your Deals pipeline so your sales team’s view stays uncluttered and your onboarding automations only fire on the right records.
Configure your pipeline stages
Add one stage for each milestone you defined in Step 1. Each stage name should reflect a completed outcome, not a task in progress. "Documents Collected" is clearer than "Collecting Documents" because it signals something is done, which is what your workflow triggers will look for. Below is a stage structure that works well for professional services firms:
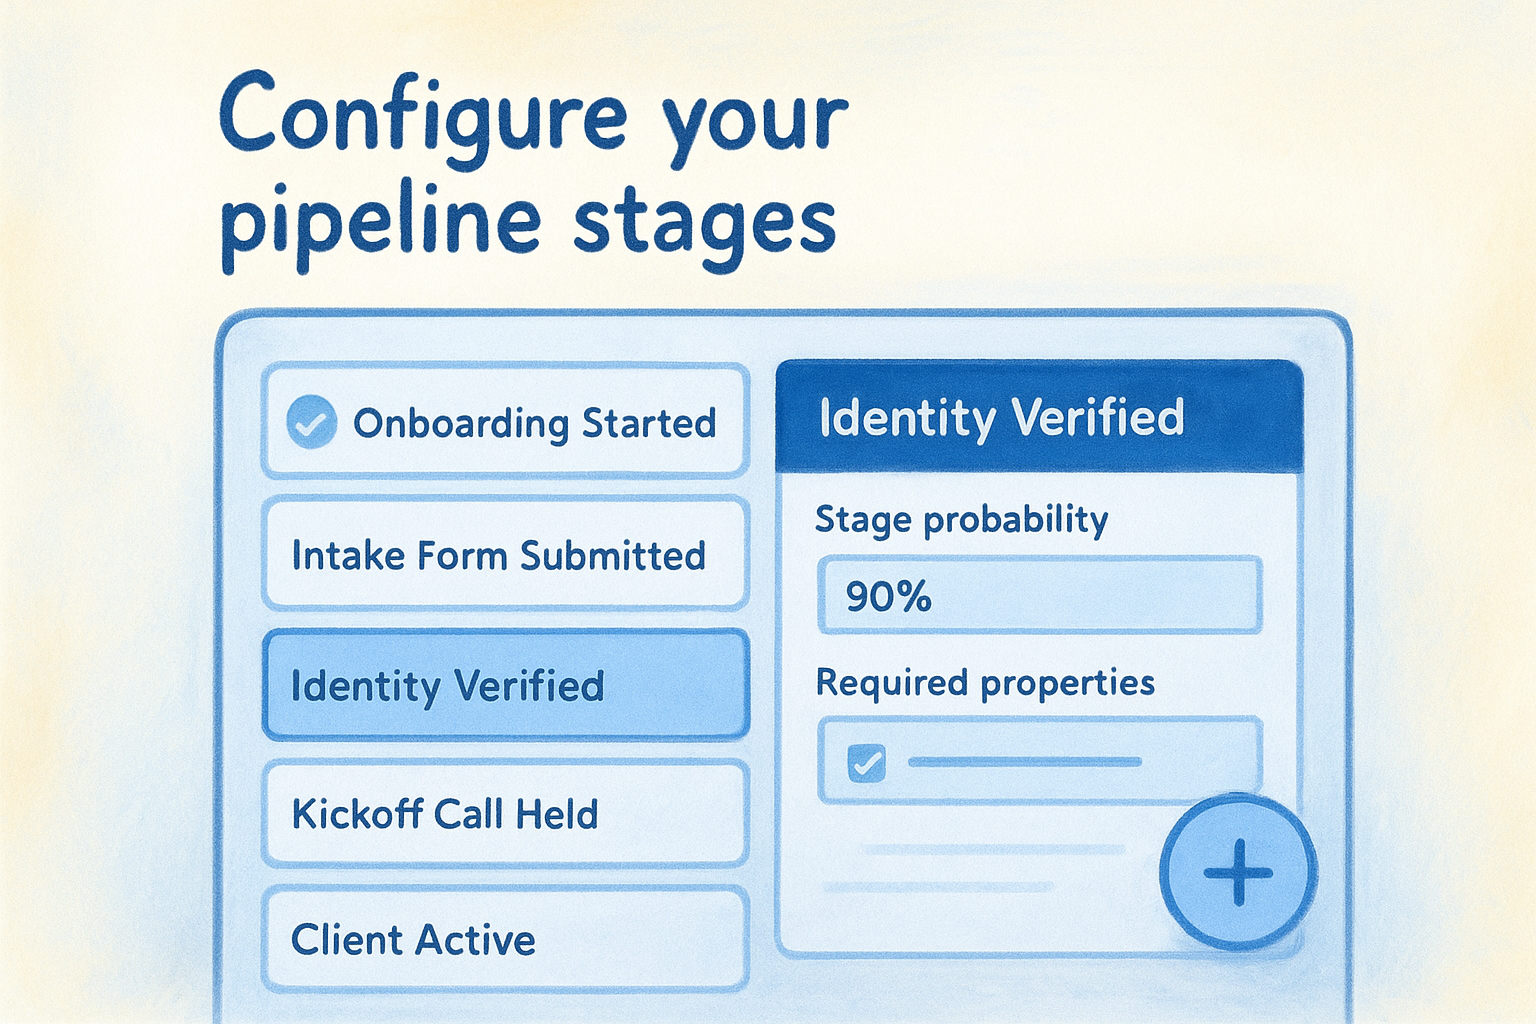
| Stage | What it signals |
|---|---|
| Onboarding Started | Ticket created from closed Deal |
| Intake Form Submitted | Client has sent required documents |
| Identity Verified | KYC/AML check completed |
| Kickoff Call Held | Meeting logged against the Ticket |
| Client Active | All steps complete, ticket closed |
For each stage, set a stage probability (used for reporting) and assign a default ticket owner so responsibility is clear from the moment a record enters that stage. HubSpot also lets you configure required properties per stage, which is worth enabling for compliance-heavy steps like identity verification, where you need a specific field populated before the stage can advance.
Once your stages are in place, test the pipeline by creating a dummy Ticket and manually moving it through each stage. Confirm that the right fields appear as required at each transition before you connect any live automations in the steps that follow.
Step 3. Create intake, kickoff, and handoff assets
Your pipeline stages and milestones mean nothing if your team doesn’t have the actual assets to move clients through them. This step focuses on building the three core documents that power your HubSpot client onboarding process: an intake form that collects everything you need upfront, a kickoff template that structures your first real conversation, and a handoff document that formally closes the onboarding record. Get these right and your automations have something solid to trigger on.
Build your intake form
HubSpot’s native form builder (found under Marketing > Forms) lets you create a form that maps directly to your Ticket or Contact properties. Build one form that collects every piece of information you need before the kickoff call: business name, ABN, primary contact details, service scope, and any compliance documents required. Link the form submission to a workflow that advances the Ticket to the "Intake Form Submitted" stage automatically, so nothing sits waiting for a manual update.
Avoid splitting intake across multiple forms. One comprehensive form with clear sections is easier for clients and cleaner for your automations to process.
Use conditional logic in the form to show or hide fields based on earlier answers. For example, if a client selects "Company" as their entity type, you can reveal an ABN field that a sole trader would never see. This keeps the form short for each client type while still capturing everything your team needs.
Prepare kickoff and handoff templates
Your kickoff call template should be a logged call or HubSpot Meeting with a standard agenda attached as an internal note. Create a note template that your account managers paste into every kickoff record so the same key topics are covered each time:
- Confirm service scope and deliverables
- Set timelines and client responsibilities
- Confirm identity verification is complete or scheduled
- Agree on the primary communication channel
For the handoff document, create a HubSpot email template that your team sends when onboarding closes. It should summarise what was set up, who the client’s ongoing contact is, and what they should do next. Triggering this email from a workflow when the Ticket moves to "Client Active" means it never gets skipped, regardless of which team member managed the onboarding. Store the template under Conversations > Templates so every team member can access it directly from their inbox without hunting through shared drives.
Step 4. Automate emails, tasks, and SLAs with workflows
This is where HubSpot’s workflow builder does the heavy lifting. Once your pipeline stages and assets are in place, you connect them with automations that fire the right email, assign the right task, and flag overdue steps without anyone needing to remember. A well-built HubSpot client onboarding workflow reduces your team’s manual load significantly and keeps every client moving at the same pace.
Set up your trigger and enrolment criteria
Navigate to Automation > Workflows and create a new Ticket-based workflow. Set the enrolment trigger to "Ticket stage is equal to Onboarding Started" so the workflow fires the moment a new onboarding record enters your pipeline. Add a re-enrolment condition so that if a ticket somehow re-enters that stage, it doesn’t send duplicate emails to the same client.
Only allow re-enrolment if your process genuinely requires it; leaving it off by default prevents a common automation mistake that is awkward to explain to clients.
Filter enrolment by Ticket pipeline so this workflow only acts on your onboarding pipeline and never touches support or service tickets that share the same stage names.
Build the email and task sequence
Add your actions in order, using delays between them to space out client-facing communications and internal tasks appropriately. Here is a practical sequence template you can copy directly into your workflow:
| Delay | Action | Type |
|---|---|---|
| Immediately | Send welcome email | Client email |
| Immediately | Create task: Send intake form link | Internal task |
| 1 day | Send intake form reminder | Client email |
| 3 days | Create task: Chase outstanding documents | Internal task |
| Stage: Intake Submitted | Advance ticket to next stage | Automation |
Use personalisation tokens in every email (contact first name, account manager name, company name) so the messages feel direct rather than generic. HubSpot pulls these from the associated Contact and Company records, which is another reason correct object associations from Step 1 matter so much at this stage.
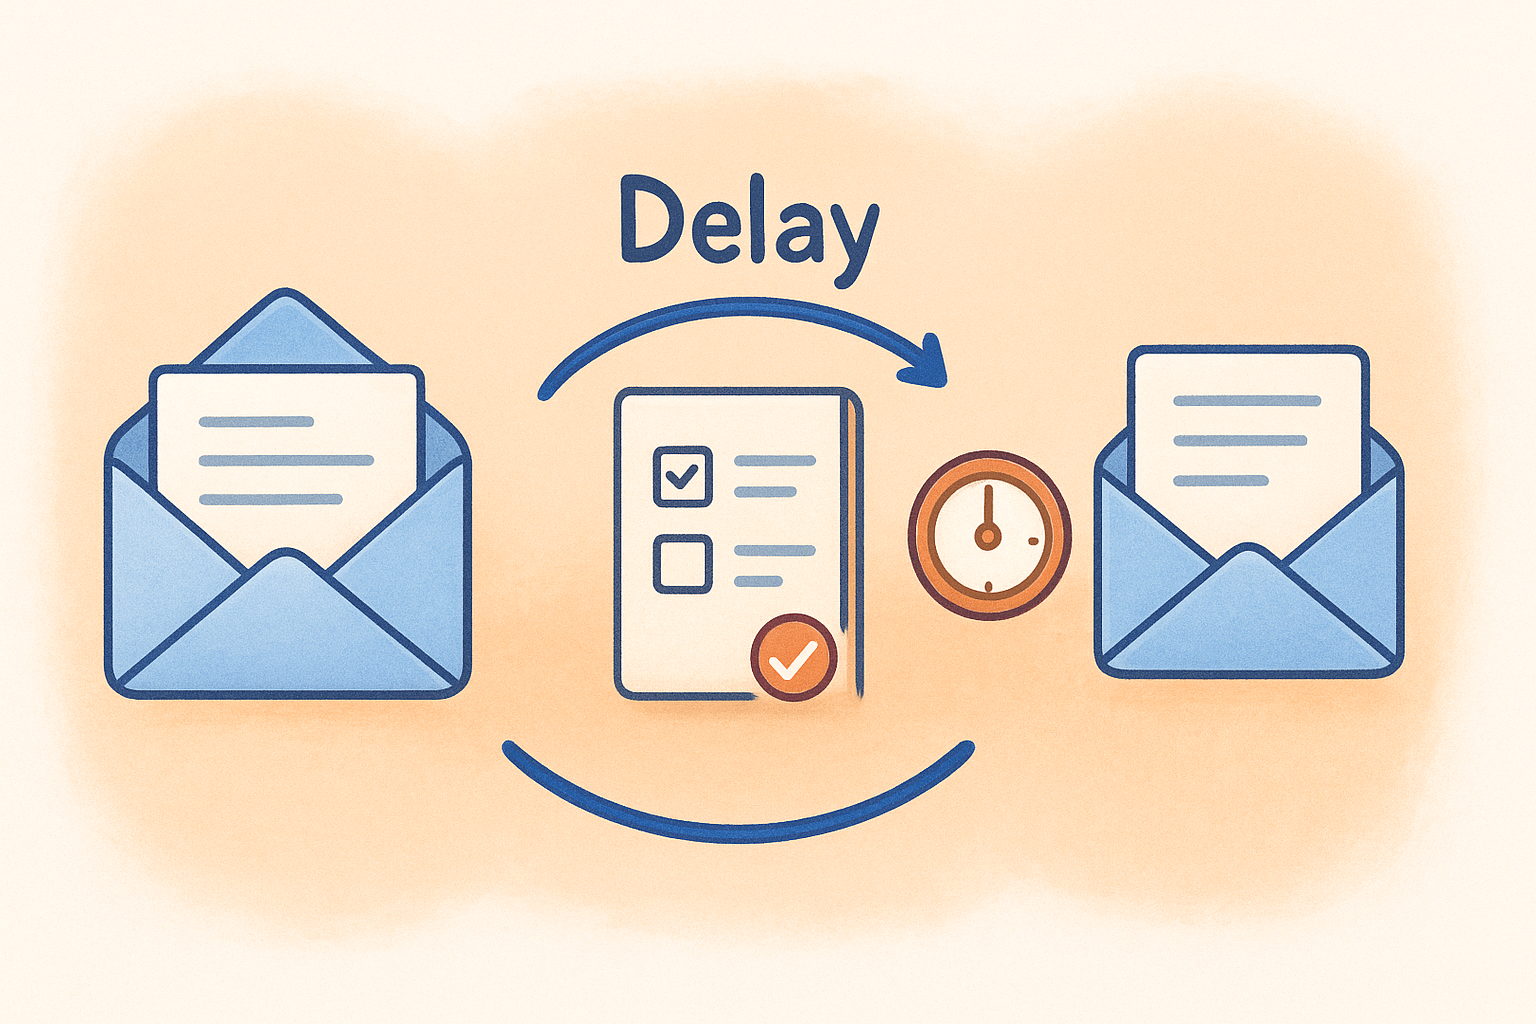
Add SLA delays and deadline reminders
Set a time-based delay of five business days after the intake form is due. If the Ticket hasn’t advanced past "Intake Form Submitted" by then, trigger an internal notification to the assigned owner and create a high-priority follow-up task. This is your SLA catch: it surfaces stuck onboardings automatically before they become a client experience problem.
Step 5. Add KYC and AML steps to your onboarding flow
For accountants, financial services firms, and legal practices, identity verification is not optional. It’s a compliance requirement that sits inside your onboarding process whether you automate it or not. The problem with most HubSpot client onboarding setups is that KYC and AML checks get handled outside the CRM entirely, creating a manual handoff that breaks your automation chain and leaves no audit trail inside HubSpot. The fix is to bring verification into the pipeline itself rather than treating it as a separate process.
Where KYC fits in your pipeline
Place your identity verification step between document collection and the kickoff call. This ordering means you never schedule a kickoff with a client whose identity hasn’t been confirmed, which protects your firm and keeps compliance steps from being treated as afterthoughts. In your Ticket pipeline, the stage "Identity Verified" should have a required property set: the KYC outcome field must be populated before the stage can advance. This forces the process and prevents a team member from skipping verification under time pressure.
Set the "Identity Verified" stage as a hard gate in your pipeline so that no Ticket can move to "Kickoff Call Held" without a verified KYC outcome recorded against it.
Use a workflow to create a high-priority internal task the moment a Ticket reaches "Intake Form Submitted", prompting the responsible team member to initiate the identity check immediately rather than batching it later in the week.
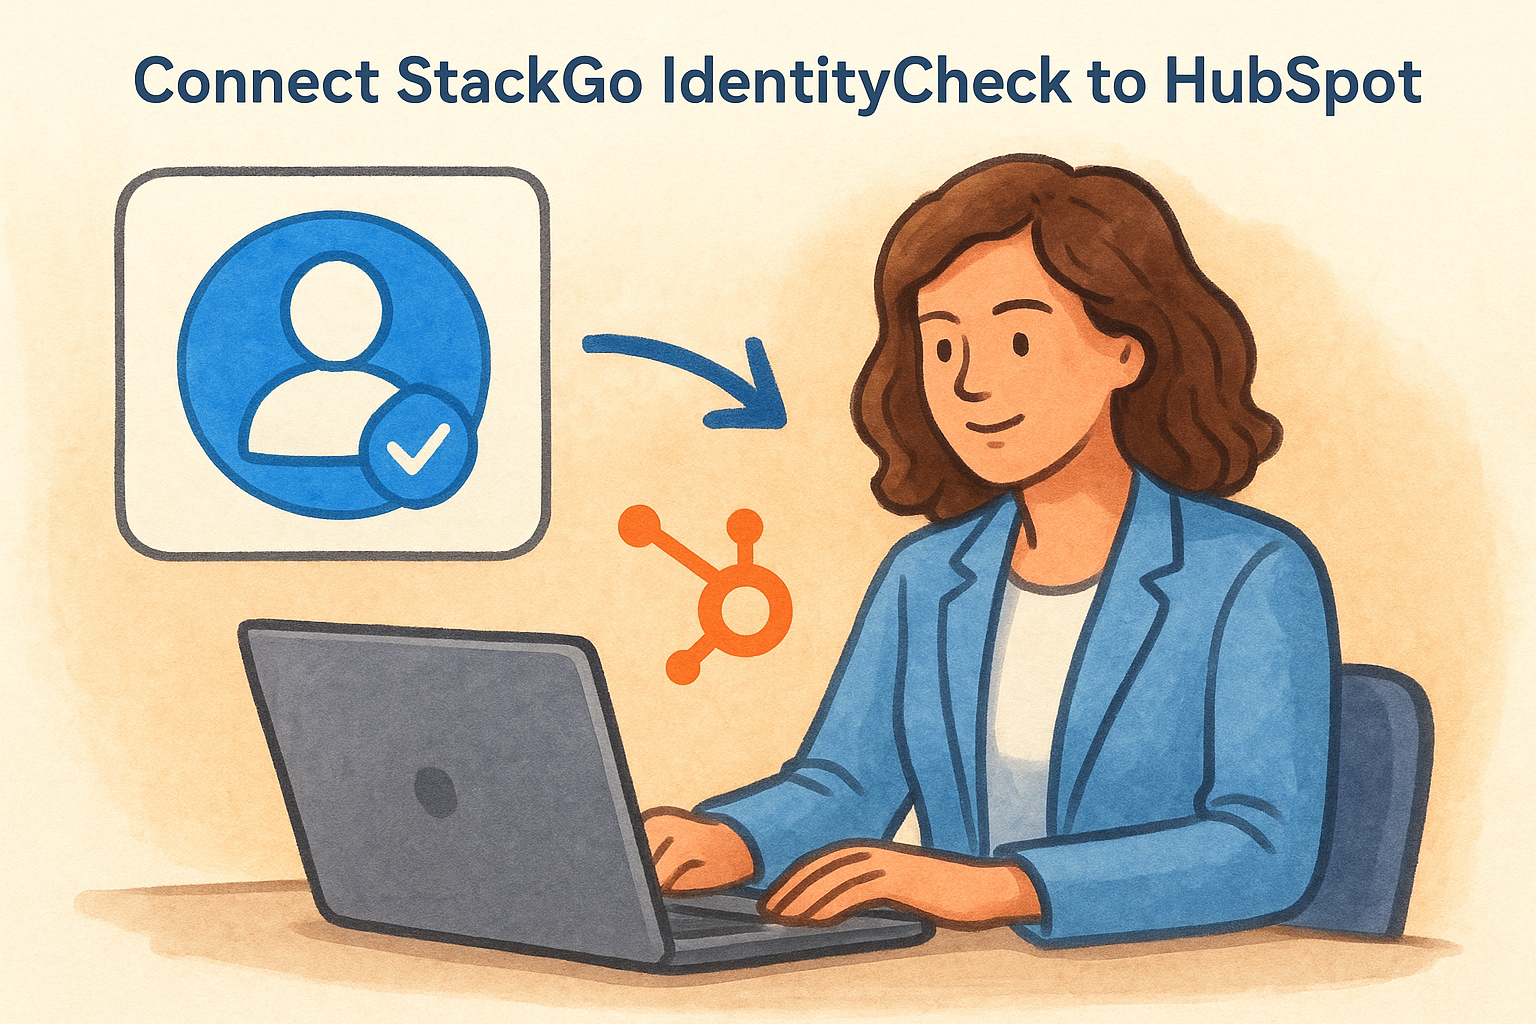
Connect StackGo IdentityCheck to HubSpot
StackGo’s IdentityCheck integrates directly into HubSpot so your team can run a full identity verification check without leaving the CRM. It reads the relevant contact properties already stored on the record, runs the check across 200 countries and 10,000 document types, and writes the outcome back to the Contact record automatically. There’s no copy-pasting into a separate platform, no tab-switching, and no manual data entry to reconcile afterwards.
Once the result is written back to HubSpot, your workflow can pick it up as a condition: if the KYC outcome equals "Verified", advance the Ticket to the next stage and send the client a confirmation email. If the outcome is anything else, assign an escalation task to your compliance lead with a link to the Contact record directly. This keeps every verification result traceable inside HubSpot and removes the compliance blind spot that manual processes create.
Step 6. Track progress and fix stuck onboardings
A workflow that sends emails and assigns tasks only does its job if someone is also watching for the records that stop moving. Stuck onboardings are inevitable, and the teams that catch them early are the ones who build active monitoring into their HubSpot client onboarding setup from day one rather than discovering problems when a client sends a frustrated follow-up email.
Use the Ticket pipeline view to spot delays
Your onboarding pipeline’s board view gives you the fastest snapshot of where clients are sitting at any given moment. Switch to the board view inside your Ticket pipeline and sort each stage column by "Last activity date" so the oldest, least-touched records surface at the top automatically. Any Ticket that has sat in the same stage for longer than your agreed SLA window without recent activity is a candidate for intervention.
Set a recurring calendar reminder for your team to review the pipeline board every Monday morning so stuck onboardings get caught within the same week they stall.
Create a saved filter in the Ticket index view with these conditions to give your team a reusable dashboard for problem records:
| Filter condition | Value |
|---|---|
| Ticket stage | Any active onboarding stage |
| Last activity date | More than 5 business days ago |
| Ticket owner | Is known |
| Pipeline | Client Onboarding |
Save this filter with a clear name like "Stalled Onboardings" and pin it to your team’s default view so it appears without anyone needing to rebuild it each week.
Build a workflow to surface stuck records automatically
Manual review catches most problems, but a time-based workflow branch catches the rest without relying on anyone remembering to look. Inside your onboarding workflow, add a branch after each major stage delay: if the Ticket has not moved to the next stage within your SLA window, trigger an internal email to the Ticket owner and create a high-priority task flagged with the client’s name and the stage they are stuck in.
Connect this escalation task to the HubSpot task queue so your operations lead can work through all flagged onboardings in one focused session rather than hunting across individual records. Keeping stuck records surfaced systematically means your team spends time fixing problems, not finding them.
HubSpot onboarding templates and examples to copy
The fastest way to build a solid HubSpot client onboarding setup is to start from a working template rather than a blank screen. The examples below are ready to adapt: copy them directly into HubSpot and adjust the specifics to match your service and client type.
Welcome email template
Your welcome email sets the tone for the entire relationship, so it needs to be clear, direct, and action-oriented. Paste this template into HubSpot under Conversations > Templates and replace the bracketed fields with your actual property tokens:
Send this email within one hour of the onboarding Ticket being created so the client knows their onboarding has started immediately.
Subject: Welcome to [Company Name] – here’s what happens next
Hi [Contact First Name],
We’re glad to have you on board. Here’s what the next few steps look like:
- Complete your intake form using the link below – it takes around five minutes.
- We’ll verify your identity as part of our compliance process.
- We’ll book your kickoff call once both steps are complete.
[Insert intake form link]
Your dedicated contact is [Owner Name] and you can reach them at [Owner Email] with any questions.
[Your name]
Pipeline stage reference table
Use this table as your stage configuration guide when building or auditing your onboarding pipeline inside HubSpot. Each stage includes the trigger condition and the automation action that should fire on entry.
| Stage name | Entry trigger | Auto-action on entry |
|---|---|---|
| Onboarding Started | Deal moves to Closed Won | Create Ticket, send welcome email |
| Intake Form Submitted | Form submission received | Advance Ticket, assign KYC task |
| Identity Verified | KYC outcome = Verified | Advance Ticket, send kickoff booking link |
| Kickoff Call Held | Meeting logged on Ticket | Advance Ticket, assign setup tasks |
| Client Active | All required properties filled | Close Ticket, send handoff email |
Workflow SLA sequence template
Build this five-step sequence as your base onboarding workflow inside Automation > Workflows. Adjust the delay windows to match your own SLA commitments:
| Step | Delay | Action |
|---|---|---|
| 1 | Immediately | Send welcome email to Contact |
| 2 | Immediately | Create task: Share intake form link |
| 3 | 1 business day | Send intake form reminder email |
| 4 | 3 business days | Create high-priority task: Chase documents |
| 5 | 5 business days | Send internal alert to Ticket owner if stage hasn’t advanced |
Each step in this sequence addresses a specific failure point: the reminder handles slow responders, and the SLA alert at day five catches anything your team hasn’t already spotted in the pipeline board view.
Next steps
You now have a complete framework for HubSpot client onboarding: a structured pipeline, automated workflows, SLA monitoring, and compliance steps that run inside your CRM rather than around it. The most important thing to do next is start small. Pick one part of your current onboarding process that causes the most friction, build that piece first, and test it with your next two or three real clients before layering in more automation.
If your business falls under AUSTRAC’s Tranche 2 AML/CTF requirements, you also need identity verification baked into your onboarding flow, not handled separately. StackGo’s IdentityCheck connects directly to HubSpot so your team can run compliant KYC checks without leaving the CRM, with results written back to the contact record automatically. Read more about how IdentityCheck handles Tranche 2 AML/CTF compliance or create a free account to see if it fits your process.


